|
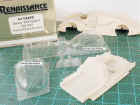
Manufacturer:Renaissance (Integral)
Subject: Bentley EXP Speed 8, LM 2001
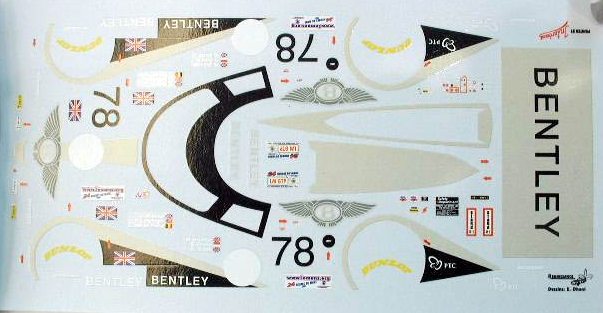
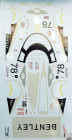
Markings: No. 7/8 car
Scale: 1/43
Kit No: Int 065PO (all open)
|
2001 marked Bentely's re-entry into Le Mans racing. The fruits of their comeback effort resulted in placing third overall and first in GTP class-- very impressive for the first year back after a seventy-five years lapse. The Bentely EXP has helped put new excitement into Le Mans racing.
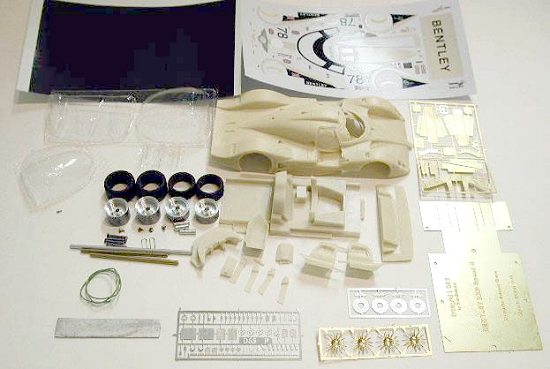
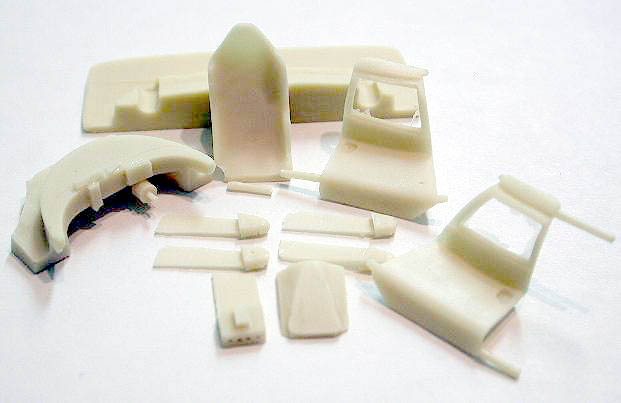
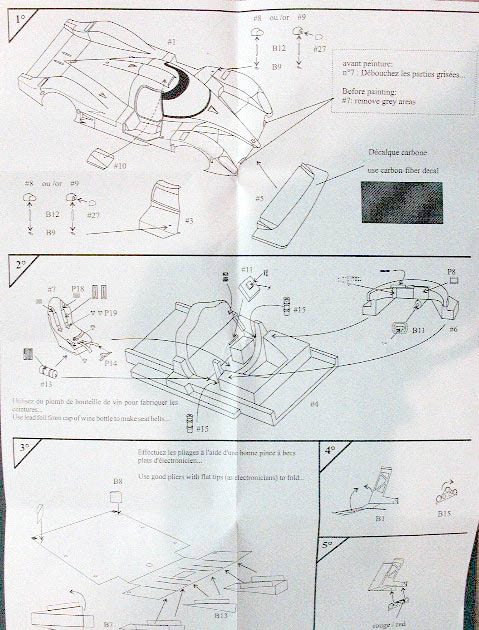
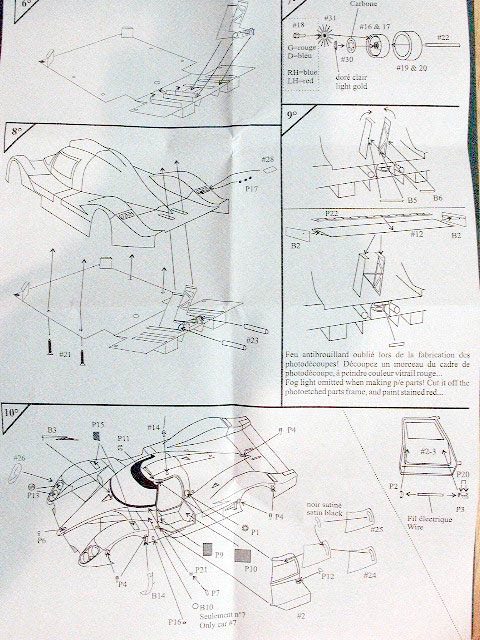
My first impressions upon seeing this kit is fabulous! The kit features opening doors that are designed to be fit in the open position; plenty of photo-etch parts, seven piece wheel assemblies; a nice decal sheet with the marking for the Number Seven or Eight car, two carbon fiber decal sheets and a beautifully cast resin body. There are five pages of instructions, one sheet of which shows color interior detail pictures.
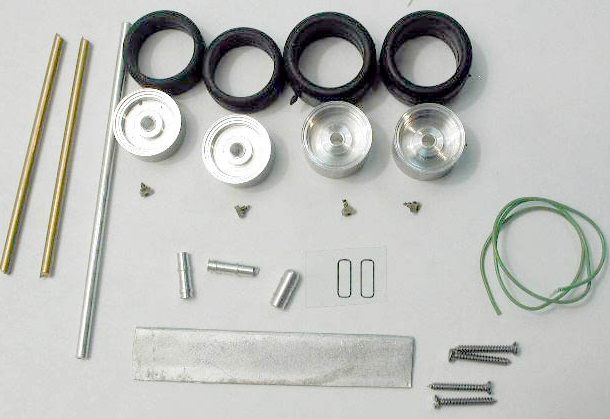
Three parts bags are in the kit: 1) Photo-etch sheets including protective inserts 2) Clear, turned, rubber, and white metal parts 3) and resin parts. Packing is done well with thought given to protecting the parts during shipment.
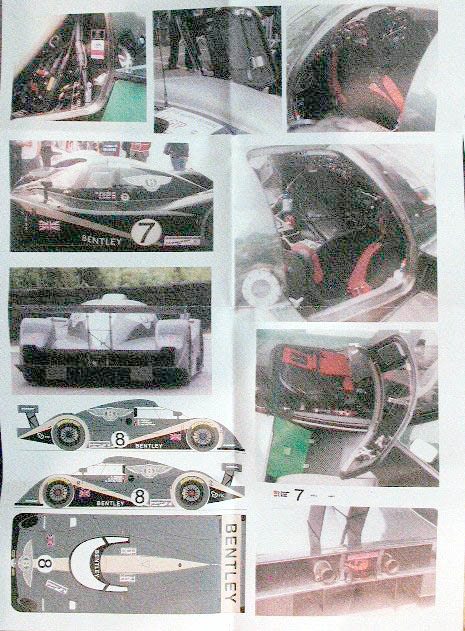
In addition to the color photo sheet included in the kit, excellent photo references can be found on the Amazing 43 web site to add extra detail to this kit.
Reference - Le Mans 2001 Bentley EXP8
Others article related to Bentley - The Provence Moulage EXP8 "photographic report"
|
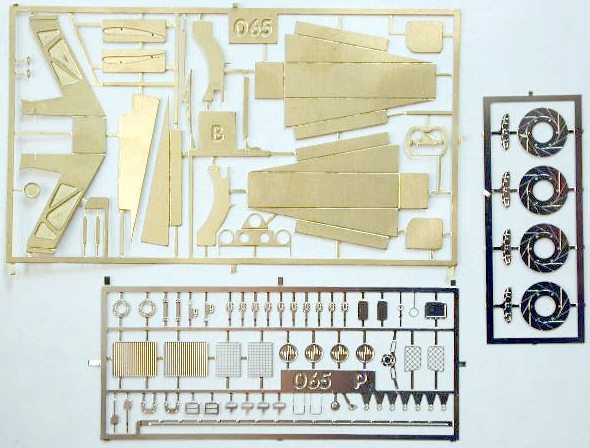
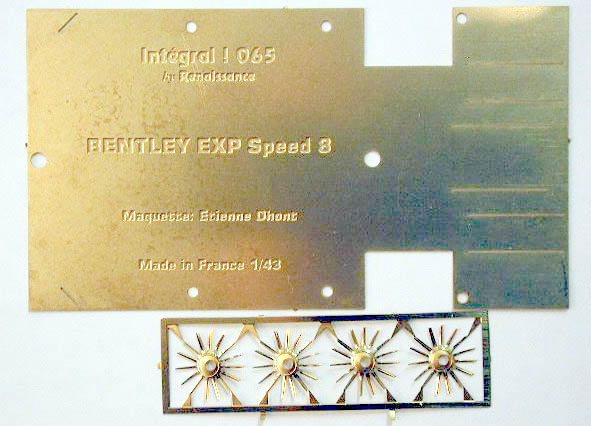
Photo-etch
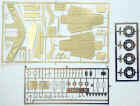
The photo-etch sheets are nicely executed with the cut-off points for each piece clearly marked. There are five sheets: 1) Brass wheels inserts 2) Nickel-plated brake drums and calipers 3) Brass body and interior parts 4) Nickel-plated body and interior parts and 5) chassis plate. The steering wheel is a photo-etch affair and leaves me wondering what approach I am going to use to get the steering rim up to scale thickness. Any ideas?
Some of the chassis parts require bending to shape and Renaissance has made this easy by engraving groves on the photo-etch piece where the bends are to occur.
|
|

|
|
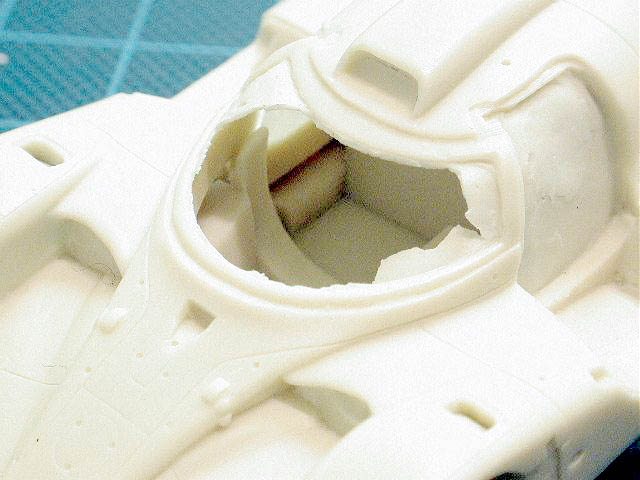
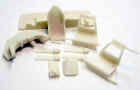
Resin Parts
The seats, dashpanel, doors, and tub are well molded and a minimal amount of clean up will be required on these parts. The gear shift is a nicely done resin piece; however, I will probably replace this with a suitable metal part from the spares box or try the various after-market suppliers (any recommendations?).
|
|
|
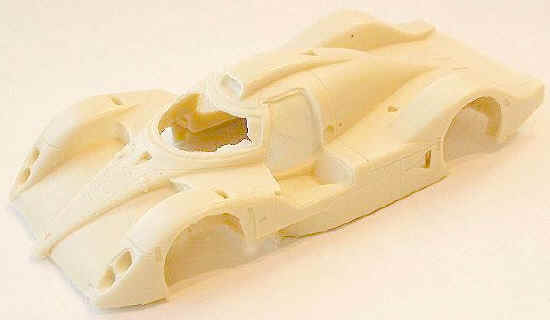
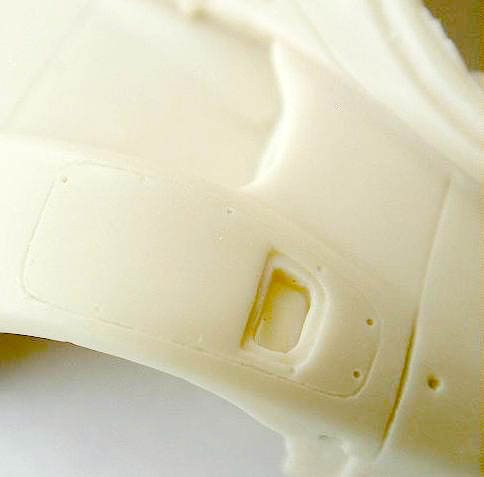
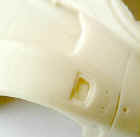
Body
The body casting is excellent. The panel line detail is crisp and well molded, even the screw recesses holding down the various panels have been molded into the body which leaves me wondering how I am going to retain them after painting. The areas around the windows, doors, vents, and wheel arches will need attention. There are moulding pegs under the body that will also need sanding off. Due to the heavy paint build-up properties of enamel paints, the panel lines will probably need re-scribing if this type paint is used.
Though I did not take measurements, the shape of the body looks right when compared to the pictures I have seen of the real car.
|

|
|
|
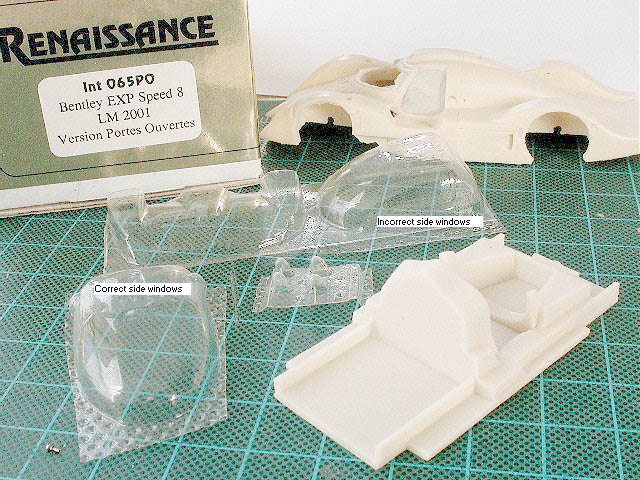
Clear Parts
There are three sheets of clear vacuform parts. The first sheet contains the clear covers for the rear view mirrors; the second sheet has the headlight covers, windshield, and incorrect side windows. Use the correct side windows on the third clear sheet instead.
|
|
|
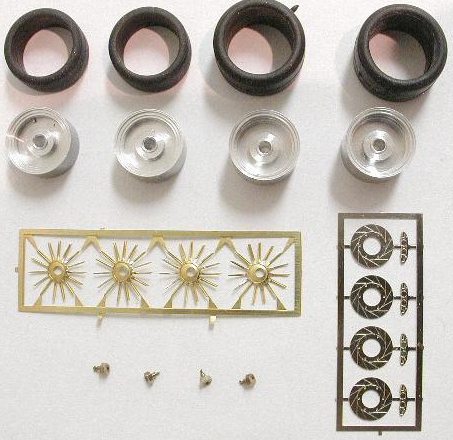
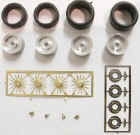
Wheels
Each wheel is a seven piece affair: rubber tire and decal; turned wheel; brake disk and caliper; spokes insert, and knock-off nut. I imagine them to look lovely when completed. There are excellent pictures on Amazing 43 you can use as reference to detail these gems.
|
|
|
Decal Sheets
The Renaissance decal sheet is well registered and includes markings for the Number 7 or 8 car. I have used them before and encountered minimal problems.
Two sets of carbon fiber decals are included with the kit. Except for the front spoiler, the instruction sheet does not show where to place the carbon fiber in the cockpit. Instead, you have to refer to the color photos included in the kit and on the Amazing 43 web site. I estimate that one carbon fiber decal sheet is enough for this kit.
|
|
|
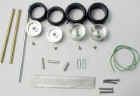
Miscellaneous Parts Bag
Three turned parts used to represent interior canisters; wire for interior pluming; a white metal rear wing (little clean-up required); laser printed rear light covers, aluminum tube for the exhaust which must be cut to length; axels and mounting hardware.
|
|
|
Cockpit
A lot of multi-media parts are provided for cockpit detailing: turned, photo-etch, resin, carbon fiber, decals and wire. A complete photo-etch seatbelt hardware set is provided; the instruction sheet recommends using the aluminum taken off wine corks for the belts.
|

|
There is plenty of room to add extra details in the cockpit area using the photo sheet that comes with the kit and the Amazing 43 web site as reference.
Conclusion
This is a wonderful kit of a beautiful car with a terrific amount of detail, and with all the easily available photos, super-detailers can have a field day.
|