|
|||||||||||||
|
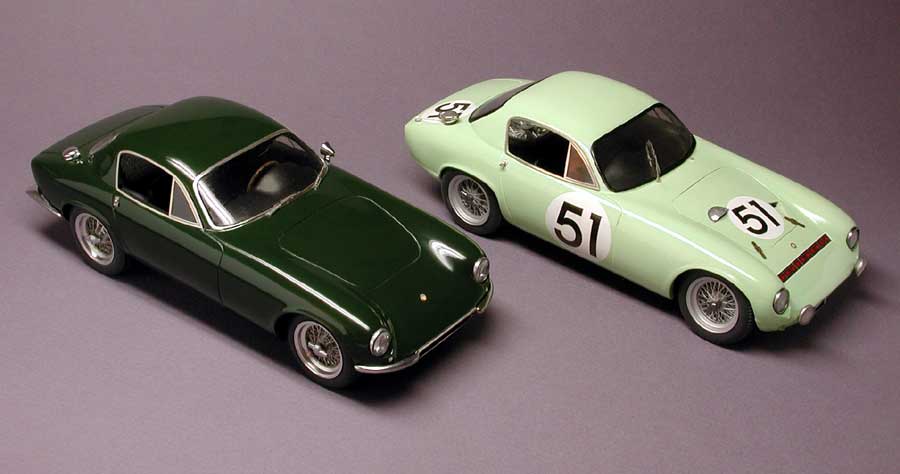
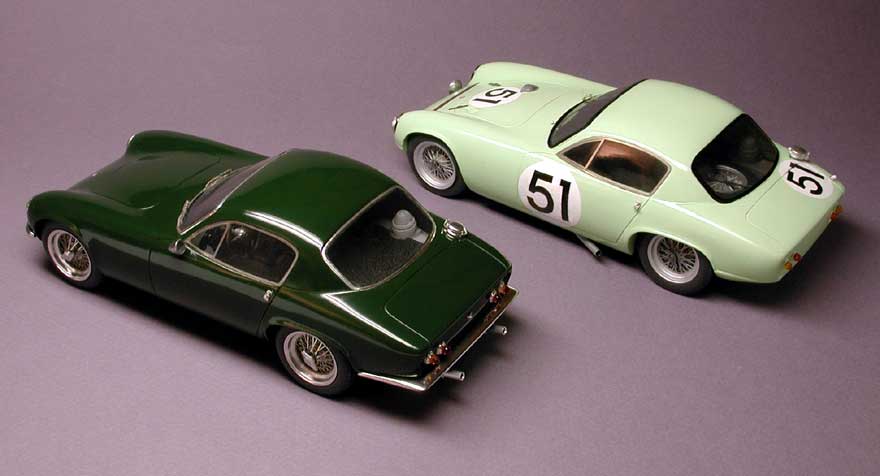
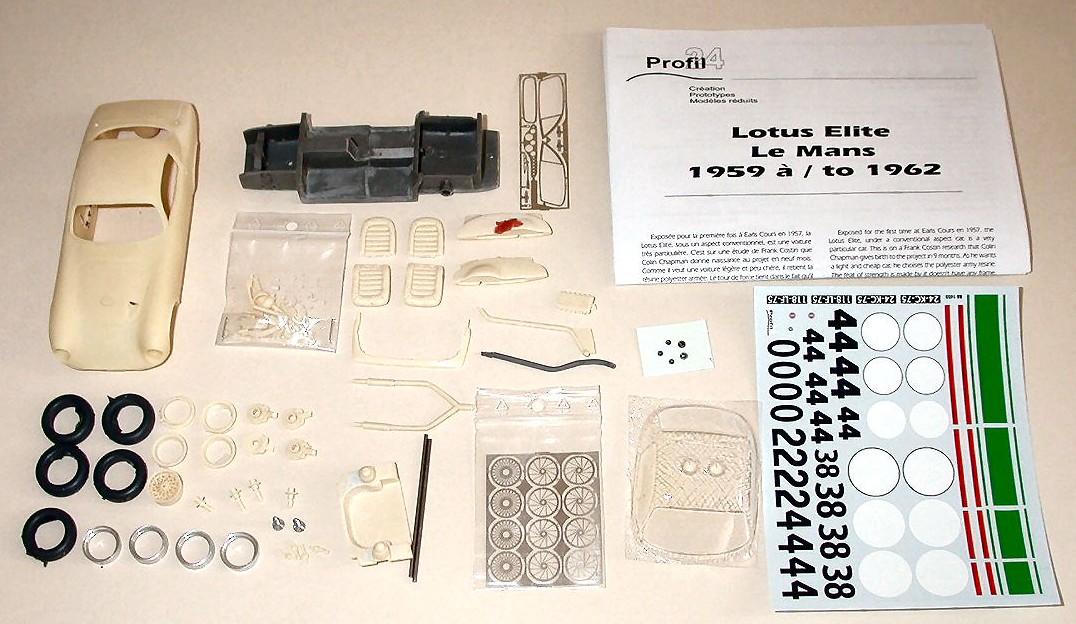
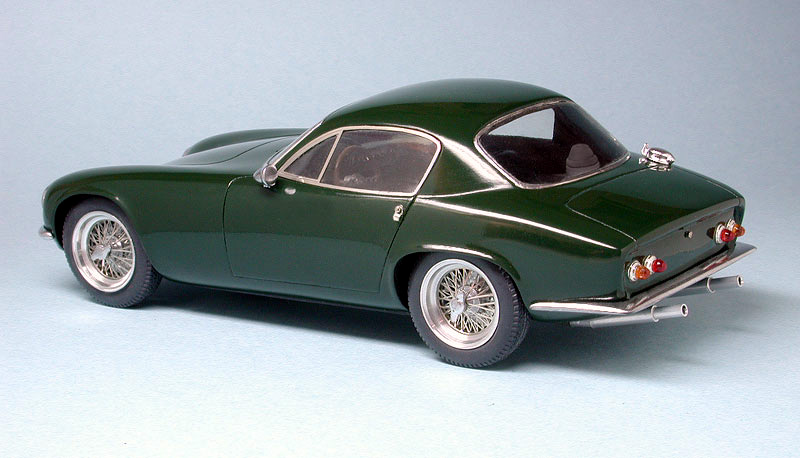
Hand a model kit to two people and you’re bound to get two different models. We two looked at the Profil 24 Elite racer and decided to build kits together, but in opposite directions. Dale King took the kit back to the original left-hand-drive street model he fell in love with in the early 1960s in Southern California. I on the other hand have a thing about BRP/UDT Laystall and decided to build an actual racer from the 1961 Le Mans 24 hours, right-hand drive. The kit gives you the option of LHD or RHD.
Dale’s notes:
After painting it was covered in Bare Metal Foil as were the windshield surrounds.
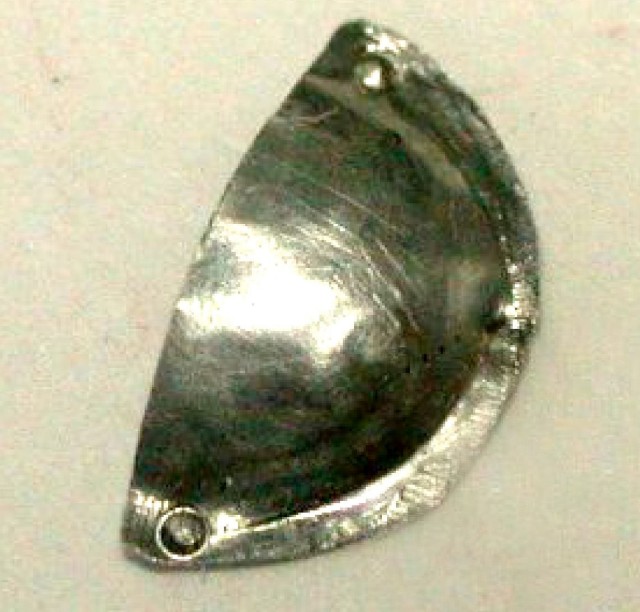
The most difficult part was reshaping and re-engineering the bumpers. In order to get them to fit properly I added a little here and removed a little there. I also installed pins on the back of the
bumpers that corresponded to small holes in the body so that they could be painted with Alclad II chrome separately. That way I could get everything to line up while it was still in primer. The mufflers and tail pipes were replaced with polished aluminium tubing. At first I painted the body in a nice powder blue like the first one I ever saw in about 1961 at the dealership where I grew up (Burbank, California) but decided it needed to be darker so I switched to British racing green. The body was shot using Tamiya British green (TS-9) right out of the can. I let it cure for about a week (it was summer and the weather was quite warm) and then rubbed it out starting with Simichrome (a tube polish found at motorcycle shops), then Tamiya polish and finally Novus 2. Most of the chrome was done using Alclad II. Although Profil 24 kits are not quite up to the standard of
some of the other resin kit manufacturers they can be built into very nice finished models.
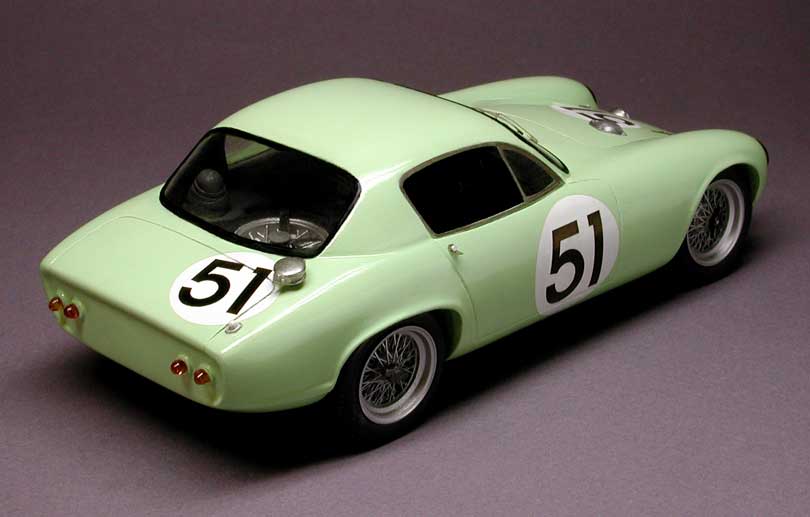
Charles’s notes: I knew where the numbers, lights, leather hood straps (supplied in the kit), fuel filler and extra air intake went, but that tartan stripe across the hood had me baffled. Until I wrote to a guy who drove for UDT a lot: you may have heard of Sir Stirling Moss. He found out (from Ken Gregory, who ran UDT with Stirling’s pop) and let me know (via the man who runs www.stirlingmoss.com , Donn Gurney!) it’s from the Macgregor clan. In contrast to Dale’s machine, mine would have no bumpers, a short dump exhaust (supplied), painted wire wheels, no rear view mirrors (on a 750cc car, down the Mulsanne?), one wiper, and a somewhat gutted interior. Martin Field in Britain supplied some more specifics: black steering wheel rim, black seats with very little padding (I gutted some XK-E donor seats), and rough but not too rough interior. This was fiberglass, but laid-up, not shot through a chopper.
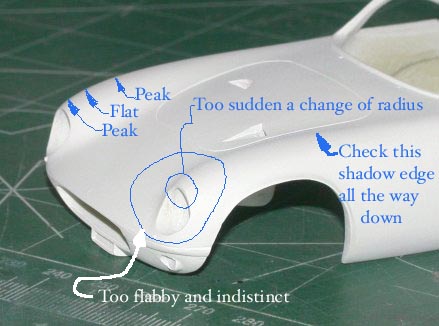
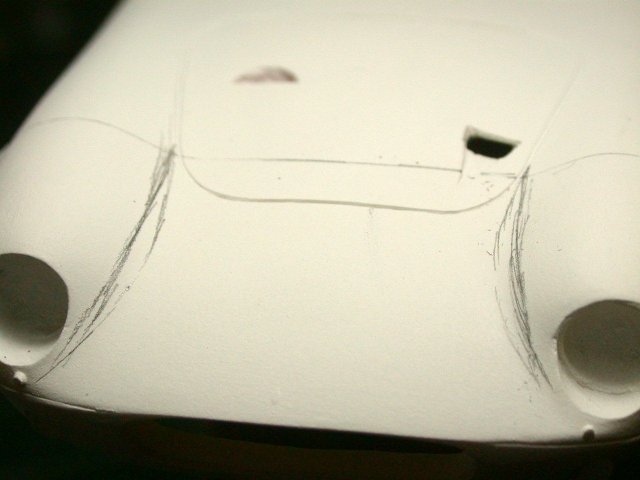
I spent a lot of time reworking the front fenders under Martin’s guidance. They needed to be thinner, more graceful. Hand-drawn pencil lines, carefully placed lights and staring at the body in a mirror helped. The third air scoop I built worked (“always hammer into, not over, a shape” said Martin and Dale; I finally listened). The printer's aluminum was free; I added “screws” to the scoop with a small beading tool. I had to order very specific paint from MCW – they sent me two to choose from. I call it Bilious Green and it graced BRM, Cooper, Ferrari and Lotus racers back in the 1960s. The paint went on beautifully! It went back on beautifully after I found some dings I’d missed on the hood, without having to repaint the whole car. Thanks, MCW! I thought a replacement solid silver (!) quick-release fuel filler, on top of a styrene tube neck, would set it all off
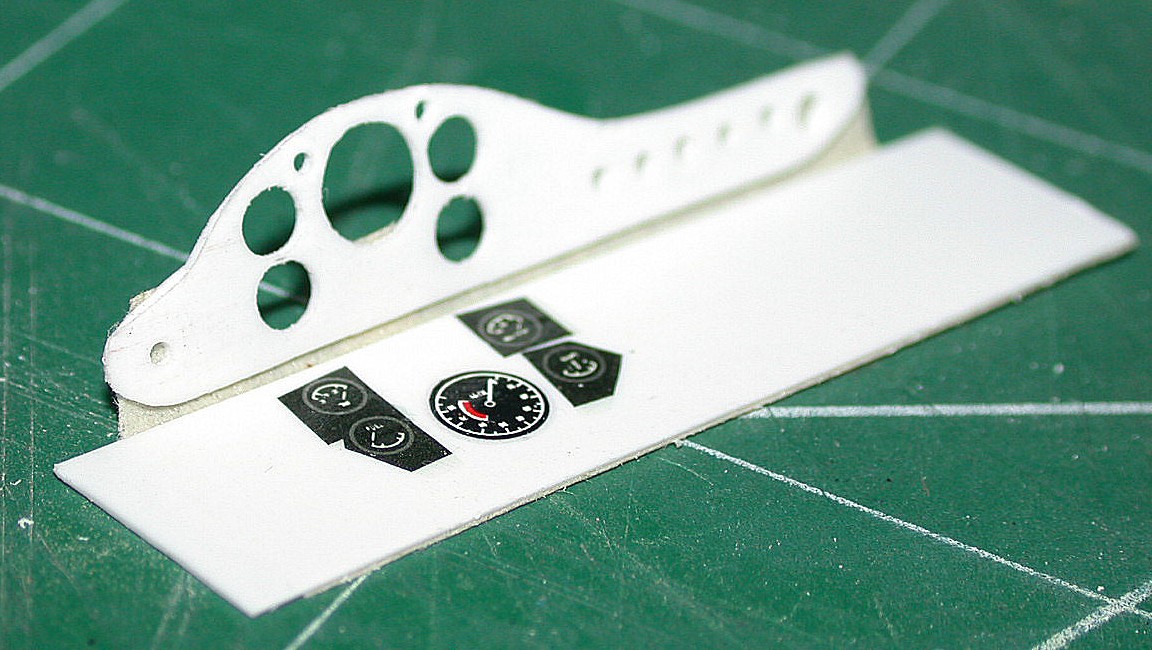
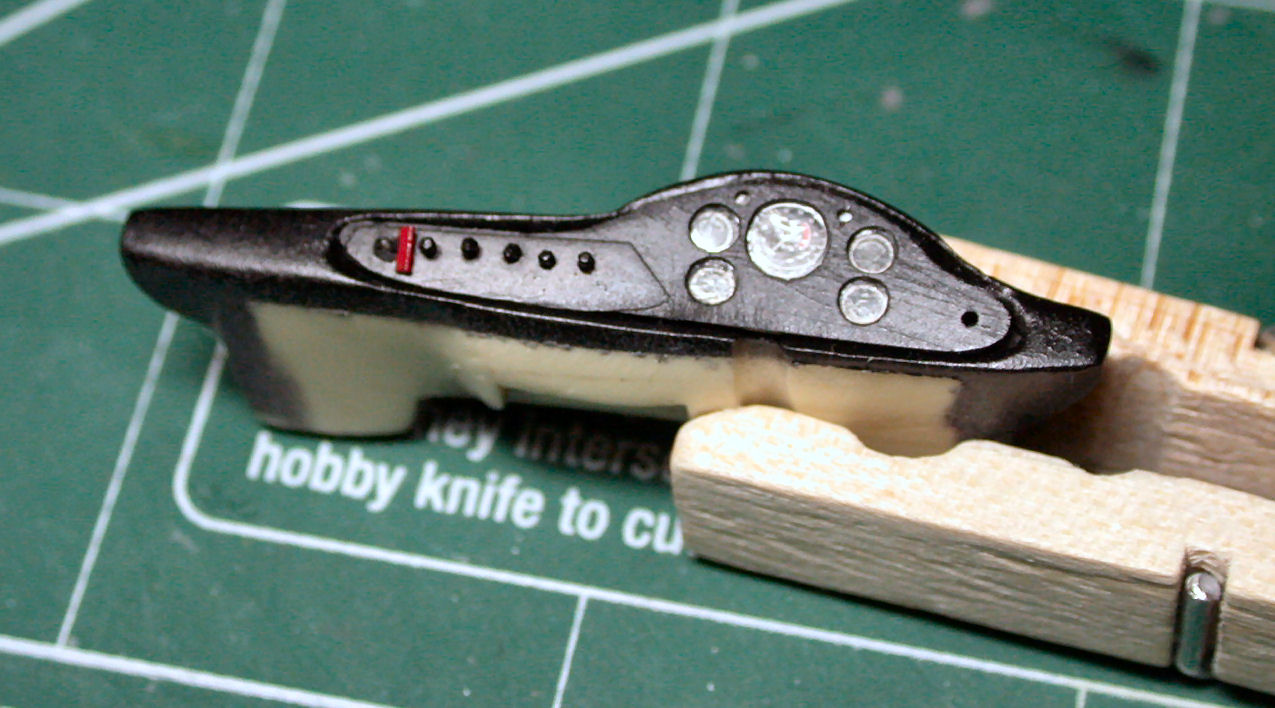
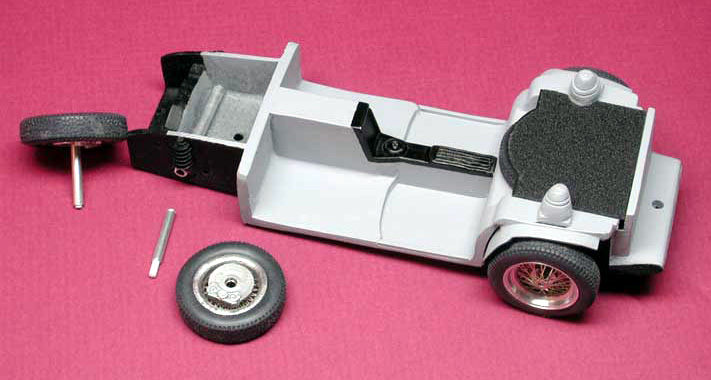
right. After that, I drilled out the resin bumps for the door handles and inserted metal rod. It’s stronger. I went overboard on the interior, carving out the doors, stripping all sound-deadening weight out. And I really put time into the dash. My racer’s was one-eyed – it didn’t have matching tach and speedo. I used spare decals for the smaller instruments, and a thin sheet of styrene for the face, traced from the kit’s photoetch; I even added kill switch and ignition key. But if you peek in the driver’s window you can see some of it. And it was fun. I also learned that Krystal Klear will stretch across the opening for an instrument and give a great glass effect. Can’t wait to build a roadster so somebody can see it. I used flat gray over Faux Fabrix for the interior and love the effect. I used flat black on the seats, but added nose oil, and that looks fine.
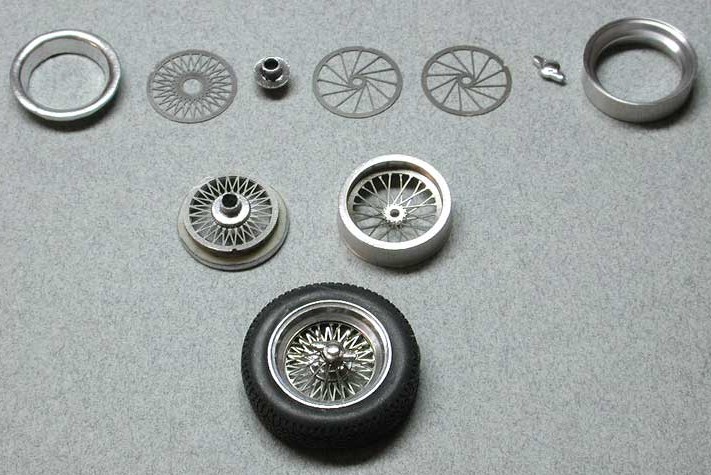
Dale warned me about two things – he was building much faster than I was. First, the body leaked light like crazy; we both had to use styrene sheet, etc. to block gaps between body and chassis. And the fit of the photoetch side window surrounds really needs careful preparation, before the body is painted. I recommend letting you partner get ahead of you like that to anybody involved in a dual – duel? – project like this; because he had all the problems first, while I just cruised. Thanks, Dale! The photoetch wire wheels over disc brakes look wonderful! Unless you louse one up, as I did. But Profil 24 came through with another – and brake, rim and tire were included, though I only needed the wires. Dale suggested Tamiya gloss aluminum following gray primer, and it looks just right for this early racer.
And when I managed to get glue fingerprints on the windows on one of the few flat places I had missed crinkling, Profil came through again with spares. Replacing it had nothing to do with the fact that I had glued it inside the body when it belongs on the outside. Thank you, Profil 24! I used liberal doses of two-part five-minute epoxy to help locate and hold the axles, wheel/brake units, and body to chassis. And then I did something absolutely brilliant. I handed my #51 to Dale to take to the NNL in Northern California. And what I got back was a car with significantly better polish (he flowed Future on), and a corrected windscreen wiper. I’ve got to remember that trick from now on.
“Hey, Dale, what do you think of this model?”
|