|
||||||||||||||||||||||||||||||||||||
|
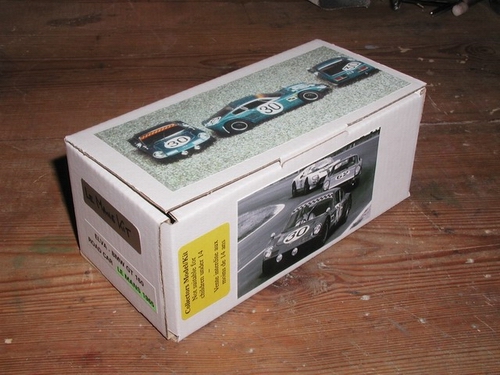
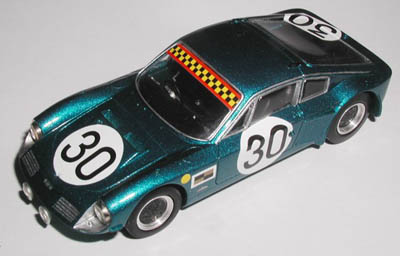
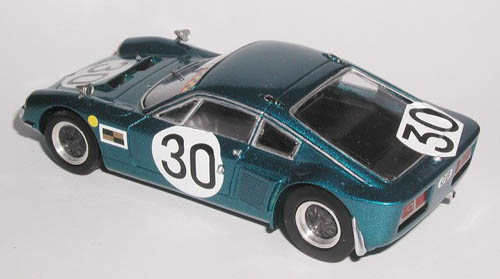
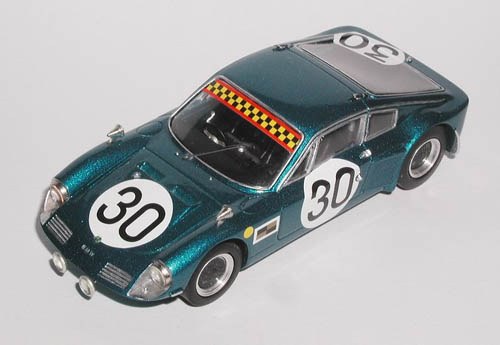
The original car was entered by Anglian Racing Developments to be driven by Sir Richard Wrottesley and Tony Lanfranchi. It was powered by the 4-cylinder 1991cc sohc BMW engine but had to retire on the 4th lap due to gearbox problems. The 1/43rd scale model was first produced by Tim Dyke of Mph Models to exacting standards and as ELVA Racing had provided original cars for measurement and historical details, they took over from Mph and now offer the same kit using the same top quality components. The GT160 models are being marketed in close collaboration with Axel’R and presented in a box showing the finished model and the original car racing in the 1965 Le Mans race.
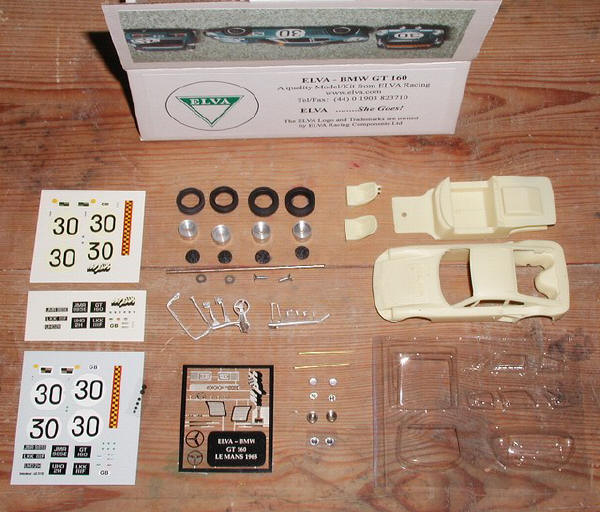
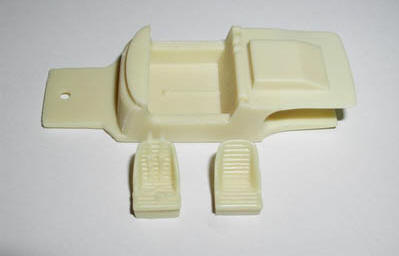
1) The kit is mainly made up from quality resin mouldings, with white metal, machined parts, photo-etch, transparent vacuum formed sheet and nice decals. There are full instructions together with a history of the GT160 road-going and racing cars.
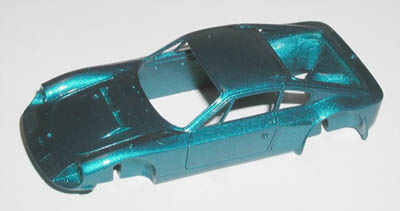
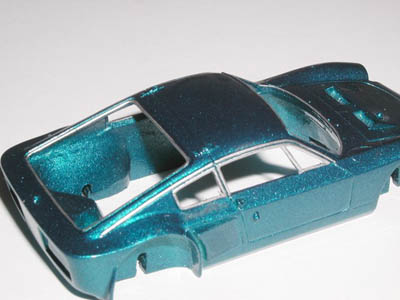
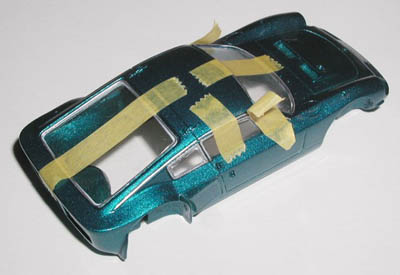
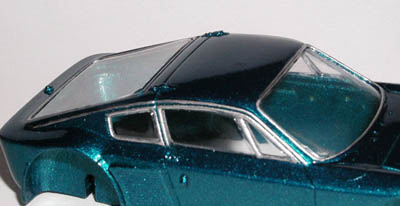
2) The first stage is to cut out and glue the side radiator grids onto the body ready for painting in the original ‘metallic Peacock blue’, and paint references are provided. The resin parts are gently sanded but as the moulding is of such good quality then little needs to be corrected.
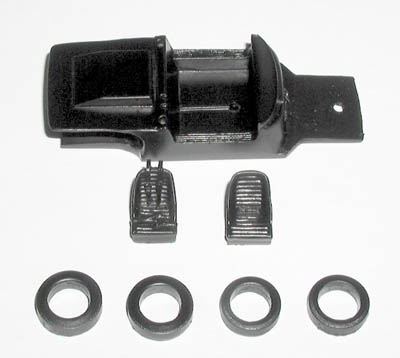
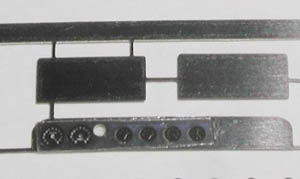
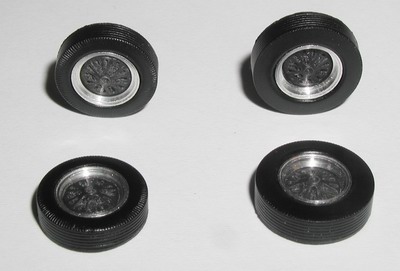
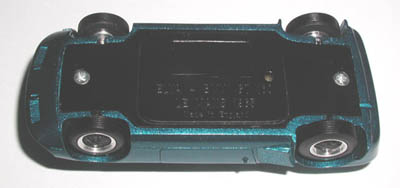
3) Paint in satin black the chassis, seats and tyres, which are again very nicely reproduced with considerable detail. When dry then paint in aluminium the floor and pedals. Then detail the race harness moulded into the driver’s seat and the window frames.
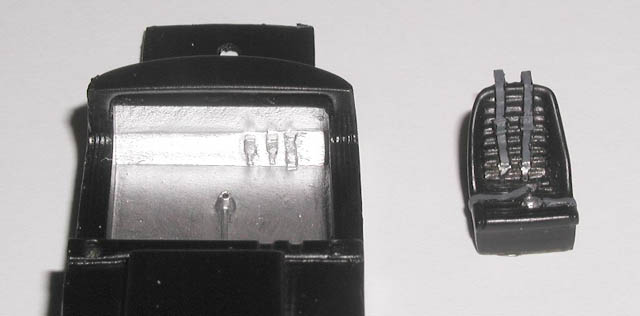
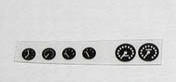
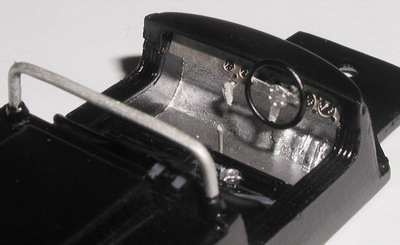
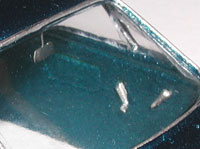
The instruments are printed onto a clear acrylic sheet and this is carefully glued on the back of the dash panel with white paint applied behind the panel, giving a very realistic effect.
5) Paint the steering wheel and glue in place and then the handbrake, seats, gear lever/shift and roll hoop
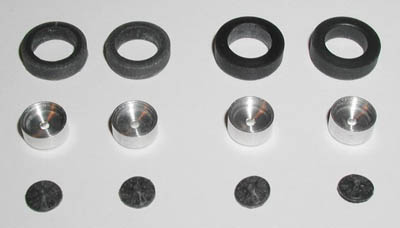
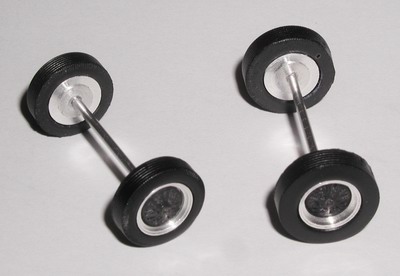
6) Assemble the wheel rims and tyres and glue to axles.
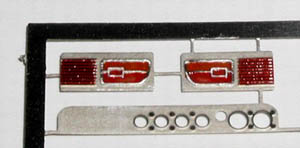
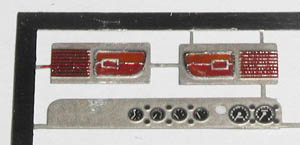
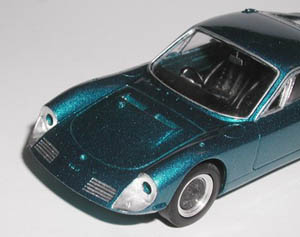
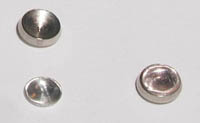
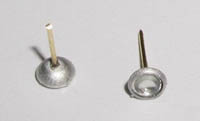
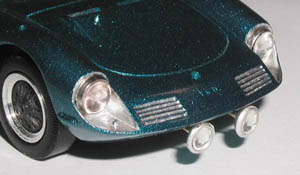
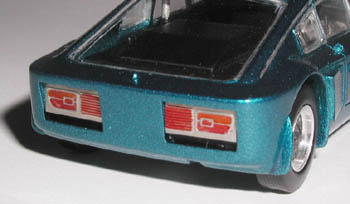
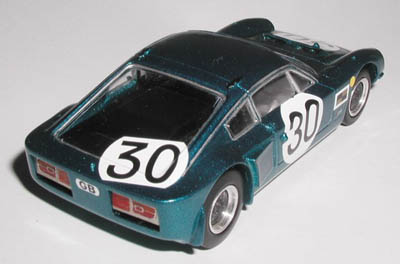
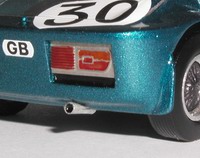
10) Glue the excellent lamps on the machined bezels and glue the mounting pins to the auxiliary lamps and then mount these on the body together with the rear lights.
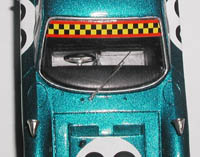
11) Apply the decals according to the photograph.
Polish the white-metal exterior mirrors and glue them in position on the front wings. Carefully place and glue the photo-etch single windscreen wiper (photo 28) and glue the exhaust under the rear bodywork.
12) Paint in silver the Le Mans race number lights, door handles and rear wheel arch extensions. Paint in brown the leather retaining straps used on the rear body section, with the buckles in silver. Then polish the model using a non-silicone (GS27) polish as the effect is much better and more realistic than painting with varnish over the decals.
This is a special model – take your time and the result will be amazing! |