|
||||||||||
|
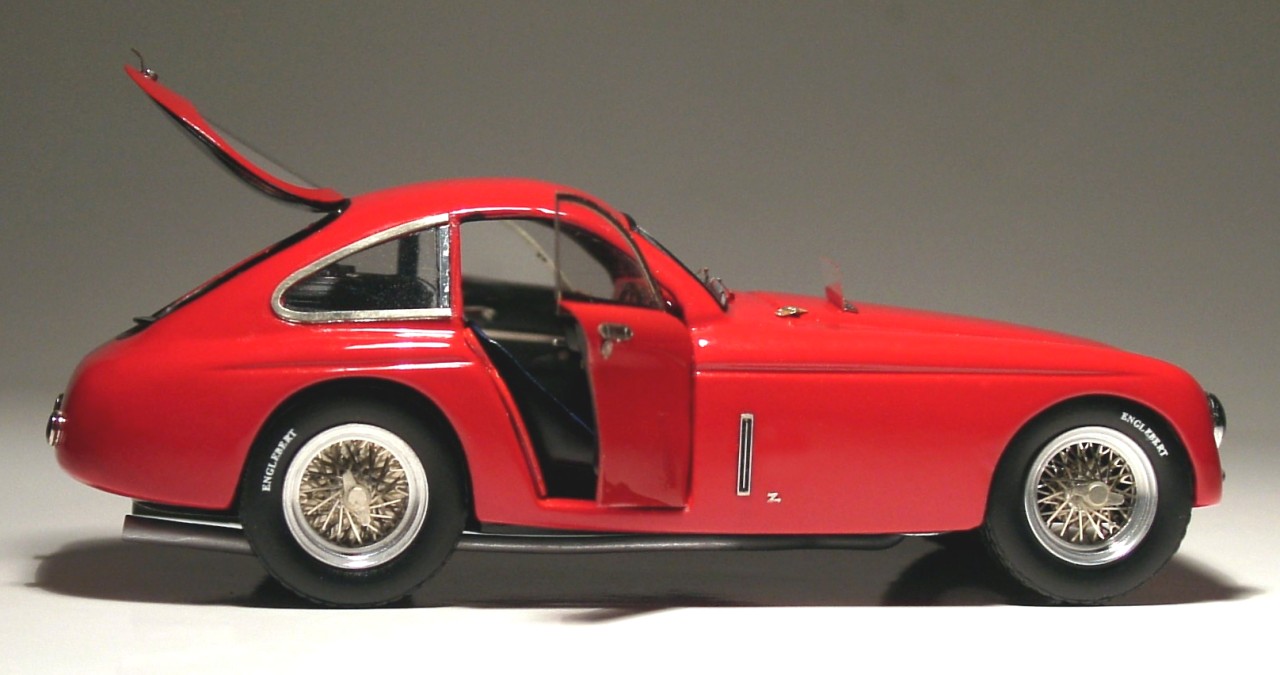
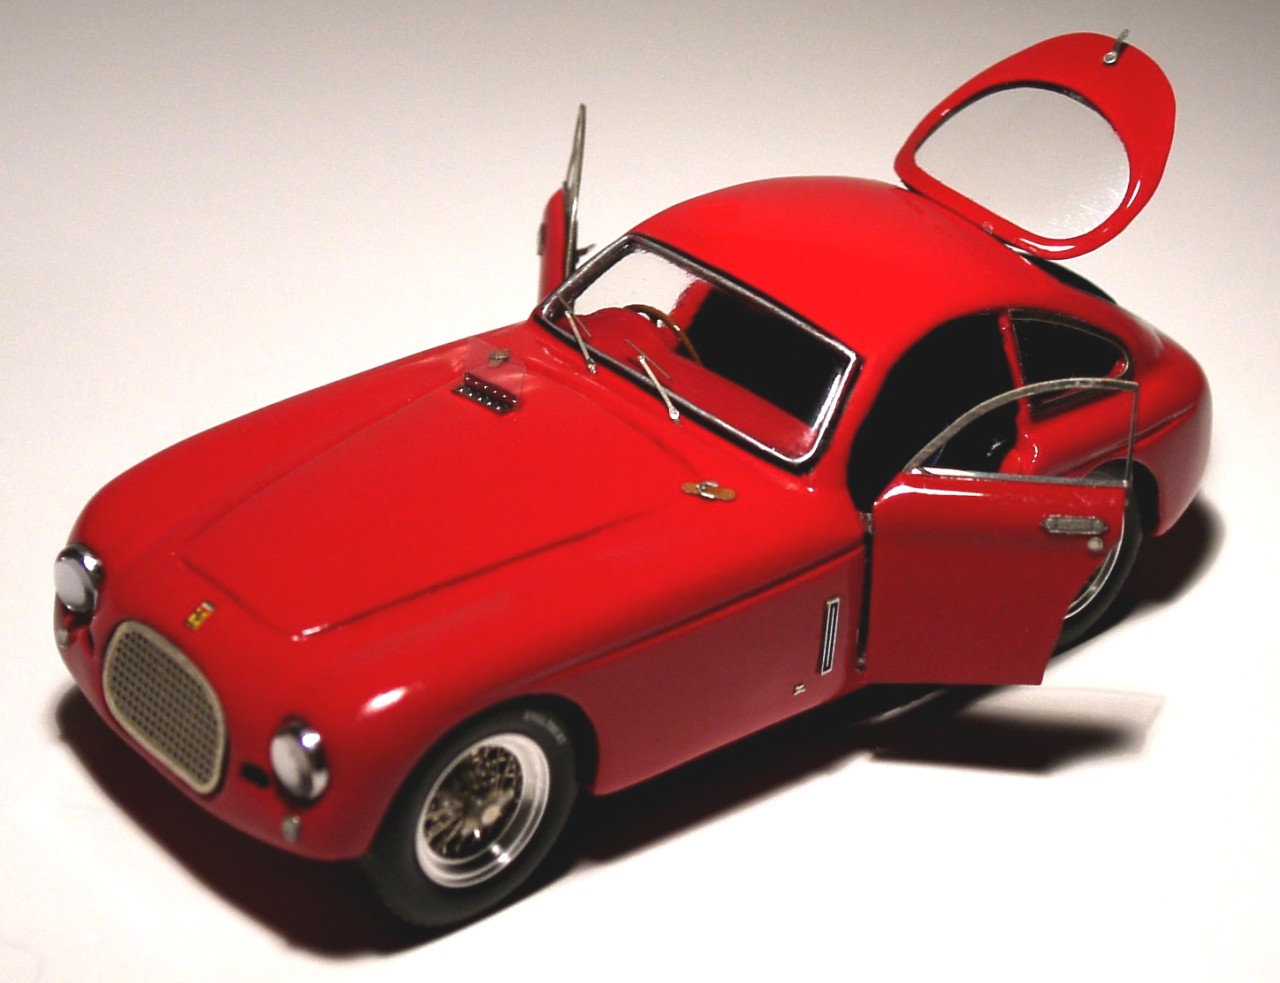
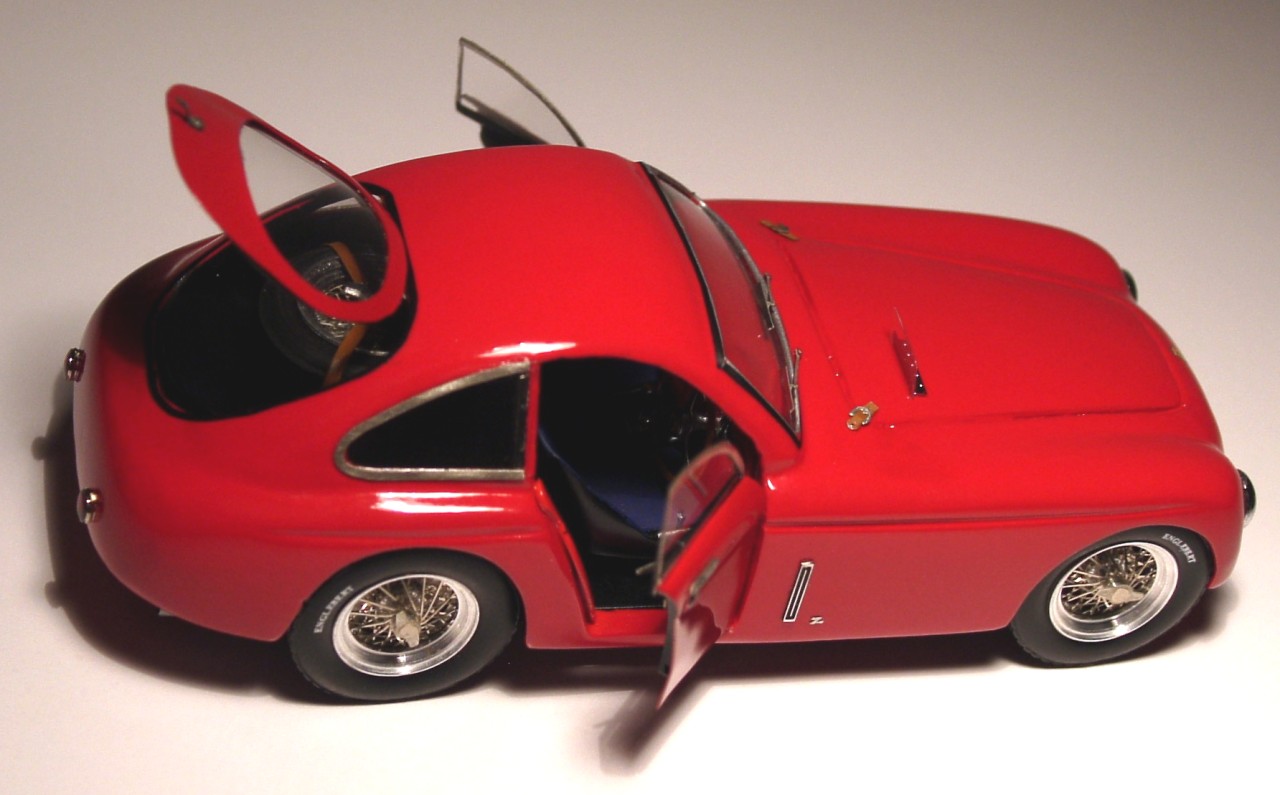
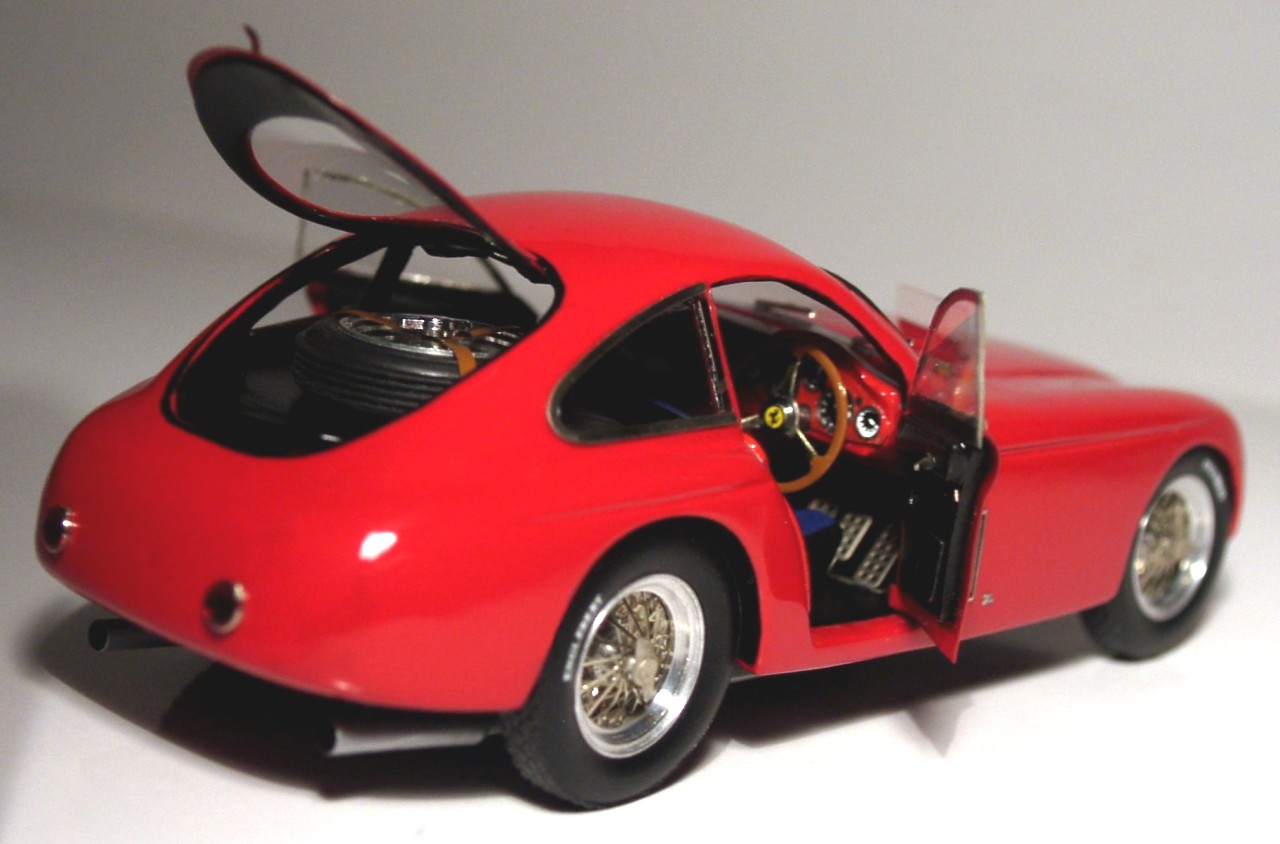
Have you ever experienced the temptation to open the doors of a model and show its interior. I must admit that at times, either because I was afraid of damaging an expensive kit, or simply because I didn’t know how to achieve the task, I decided to build the kit as it had been designed by the manufacturer.
Thus, I asked myself, when and how would I dare making such major changes, if only to experience myself all the difficulties that would have to be solved when creating new open doors or hood and trunk? Rightly, anybody can point out that there are several manufacturers, who have for several years been offering kits, designed, so that, doors, hoods or trunks can be built in an open position. These also include the required spare parts in the original kit which makes the task somewhat easier. There’s an old proverb that states that success attracts more success….. so, why not to make an attempt, and learn from new experiences?. So, without more ado, I chose a mounted resin model from Jolly Model which was in one of my showcases, and said to myself: “This is a an ideal model to try”; two doors and trunk lid; and…let’s forget about the hood and the engine itself, for the moment. Beginning…. From the beginning I encountered a serious obstacle: I could only find two or three pictures of the real thing and even less of the interior, so my apologies to those experienced modelers if there are details (and surely there are…..) which don’t match the real car. Even so, the fact is that the starting point was good, as I think that one of most important difficulties anybody should have to solve in order to give an open door a real look, are the windows frames. In this case, the mounted model had beautiful PE(s) lateral windows, so, I thought that it wouldn’t be too troublesome to cut them, so that one part could stay with the door and the other fixed to the body. Besides, the front grill was also quite an acceptable PE, that’s why without conceiving a plan beforehand, I put hands to work!. Let me tell you, that this is a resin model, but the technique I used, can also be applied to white metal models. In the end, cutting and filing tasks are the same for any sort of material. First of all, I disassembled the whole. If you’ve read the article about the Brumm Ferrari 512, it’s not necessary to repeat once again the procedure After disassembling all parts, I kept them, discarding the windows; except the front windshield as this didn’t have PE frame. If it had been supplied, a new acetate sheet could have been added, making the job easier, but in this case, there was no other option that using the original one and painting the frame.
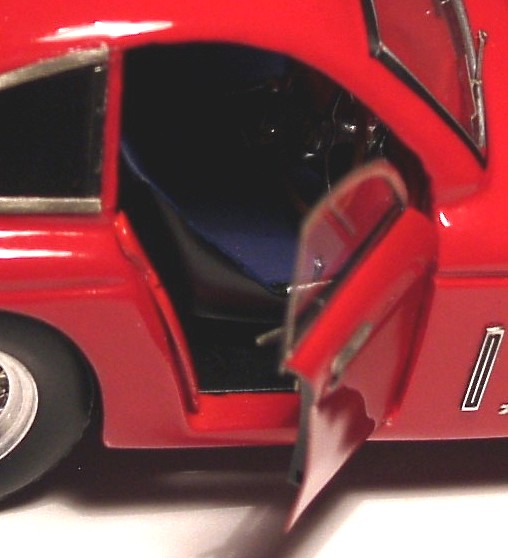
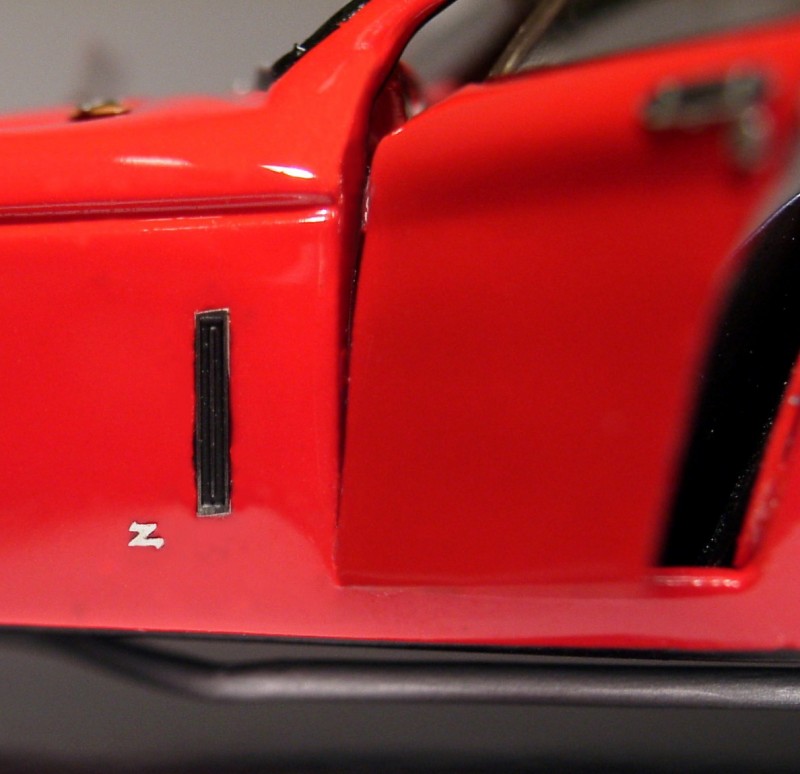
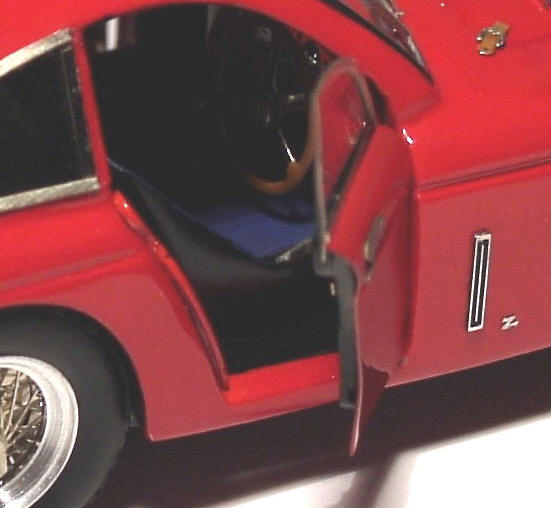
A warning: To remove the paint from this resin model, I recommend not to use a gel stripper as it can either attack the resin or damage it. So, being very patient and with sand paper, you’ll have to remove all the paint. Once the paint was removed, with a reversed blade, I outlined the doors and the trunk, to improve the definition. This is important, since from these outlines we’ll get the pattern for the new doors. I used yellow adhesive paper “Post It”. I learned this when reading an article by Stephen Barnett, and can assure you, that it’s a practical and easy method. Just I glued the paper on the door, and then, shaded the door surface with a soft pencil. The outlines were clearly highlighted. Next the adhesive tape was removed, and straight lines were drawn with a ruler. If the outline has bend lines, they can be drawn freehand, or with the help of a proper template. Now the most delicate work came: the doors removal. In this case, it was not necessary to use an X-Acto, since the trimmings were going to be thrown away, so, with a 1 or 1,5 mm drill, I made many holes following the door edge but leaving a narrow margin. It’s much more easier filing than filling….Once the holes were made, I began to cut between them using the back of a blade beginning with the vertical lines, to remove the material which holds the door joined to the body. Finally, I did the same with the horizontal lines, and by pressing lightly, the door came loose. Next, I filed, sanded and polished the contour. The shut plates for the doors are made out from plastic sheet which was glued to the body with CA. Then, the body was ready to be painted.
Making the doors…. Brass sheet is very suitable to make the doors, anyway, the aluminium from a refreshing can, can be also useful, I used a Coca- Cola can, my favourite refreshing drink…. After gluing the Post-It covering the aluminium, I took a big pair of scissor to cut following the outline I had drawn. Then, by using the handle of an X-Acto and pliers, I created the curved shape. Be careful and patient when trying this step, bend the metal little by little, since an abrupt fold could spoil everything, with little chance of repair. The door is ready to be filled and painted. The interior panels can be made from plasticard of different thickness. It’s very easy: Cut the pieces and just glue them together with cement.
As the doors would always remain open, I decided to make fixed hinges, with pieces of PE frames from my spare box, gluing them with CA between the doors and their interior panels. They should be bent so that they can fit to the body’s interior surface. The frames and windows will be fitted last to avoid damage while assembling the car. We may also, of course, add to the interior panels, the handles, and other details.
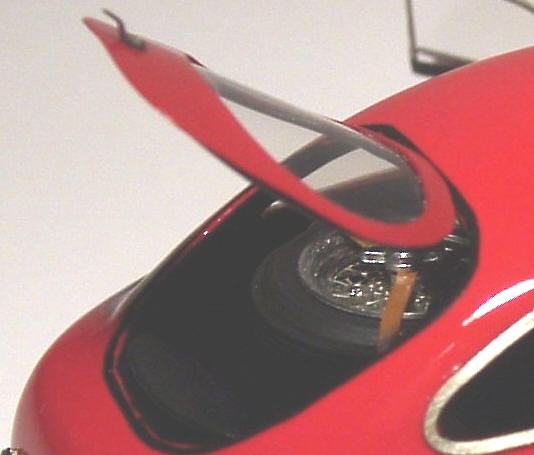
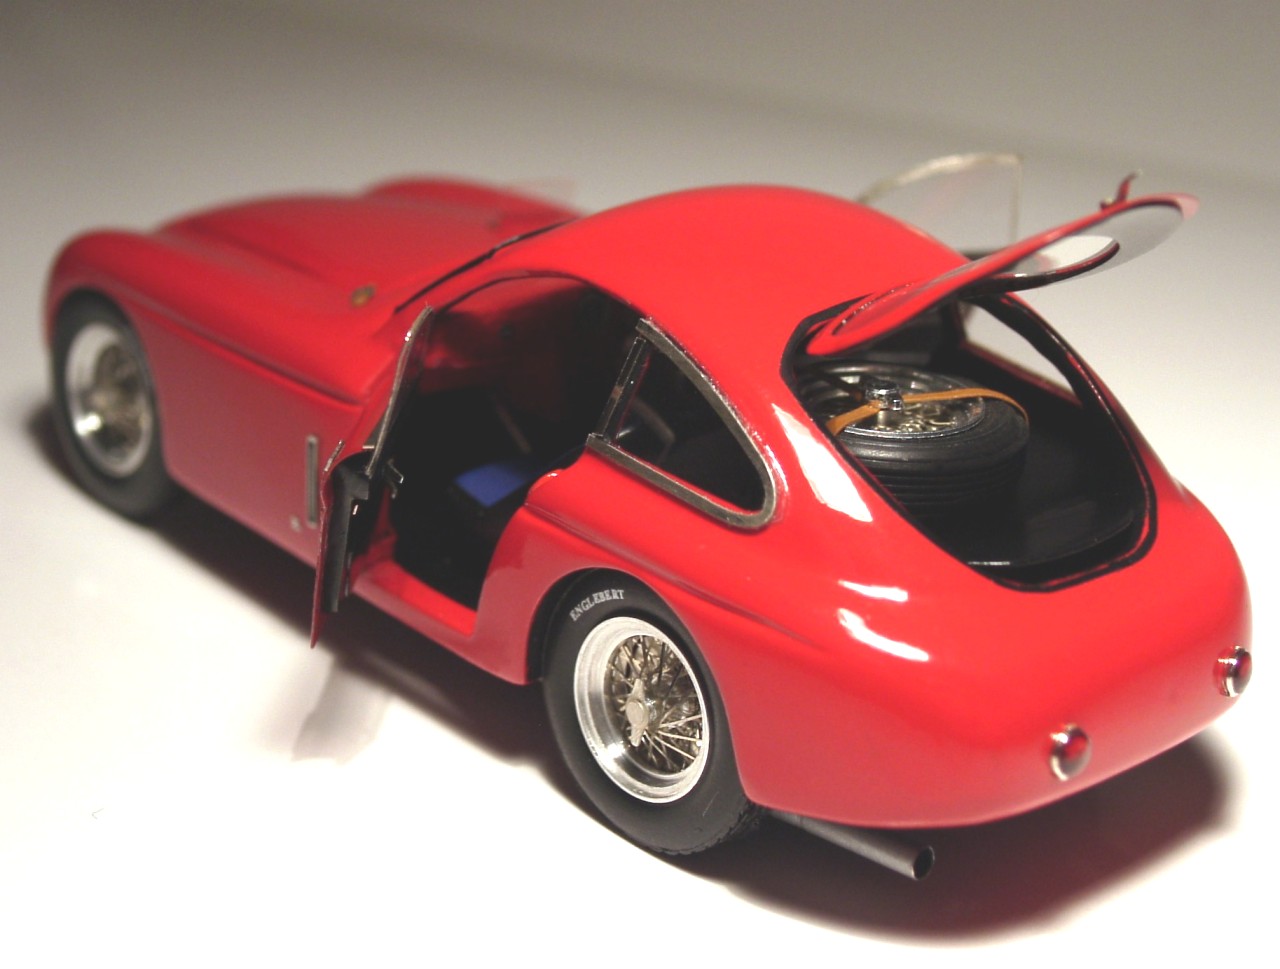
For the trunk lid, I used a drill as when removing the doors, the trunk lid is aluminium sheet. It would be very useful to create a template not only for outline but also for the shape. This required patience. The rear windshield was made from acetate film, which was glued to the trunk lid, then I added the interior trim made from plasticard.
Final assembly Once the doors were finished, the assembly is like the one of any other conventional kit, with just a difference in that we’ve personalized and detailed our model. Perhaps, next step could be the hood and why not? the engine itself….if we had the proper references.
|