|
||||||||||
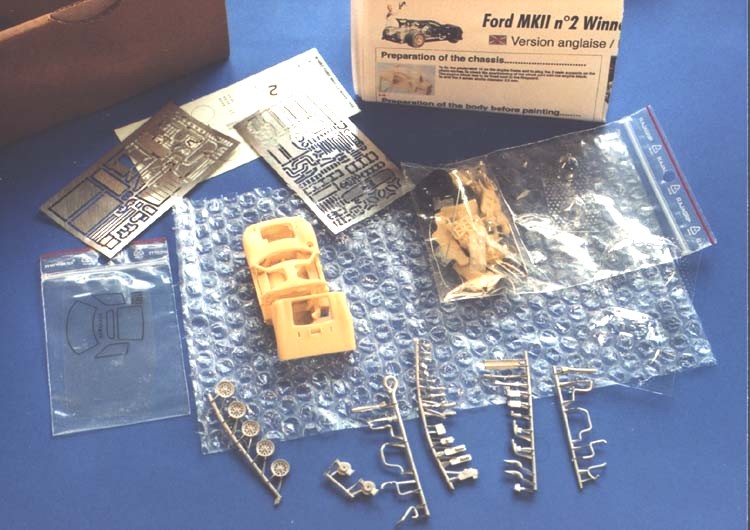
The stolen victory This is the car that stands in all the history books (well the relevant ones, speaking of motor sport) as the LeMans winner. More on the history of this car and its win later, in the full build report What’s in the box? The kit comes in a rather inauspicious brown box, slightly larger than the usual blue PM boxes. All vulnerable (e.g. resin) parts are either in separate zip-lock bags, or securely wrapped in bubble-plastic.
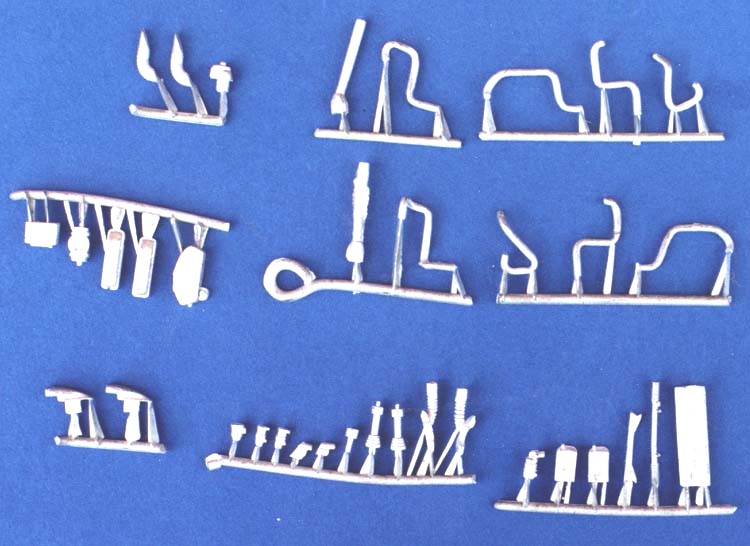
There are lots of very fine metal castings, divided into 5 trees. These comprise many of the suspension details, exhaust manifolds, …
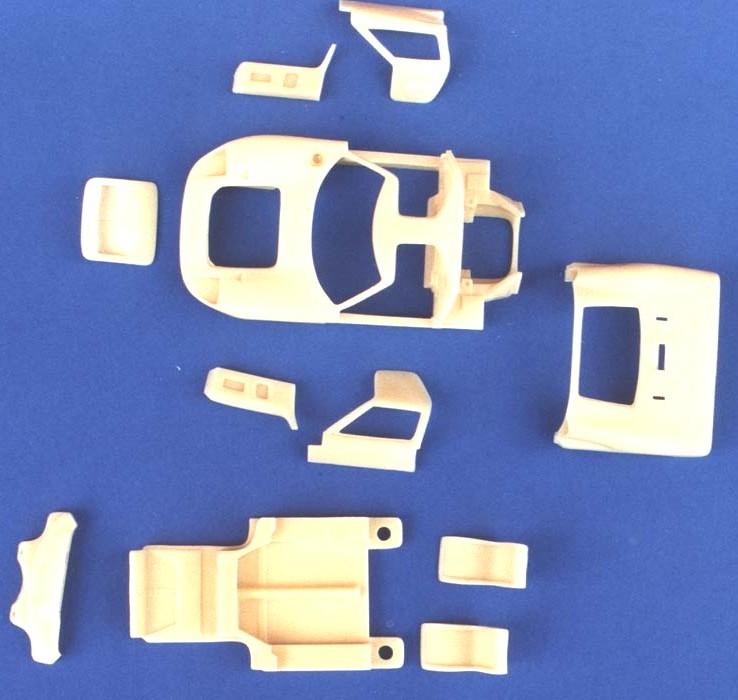
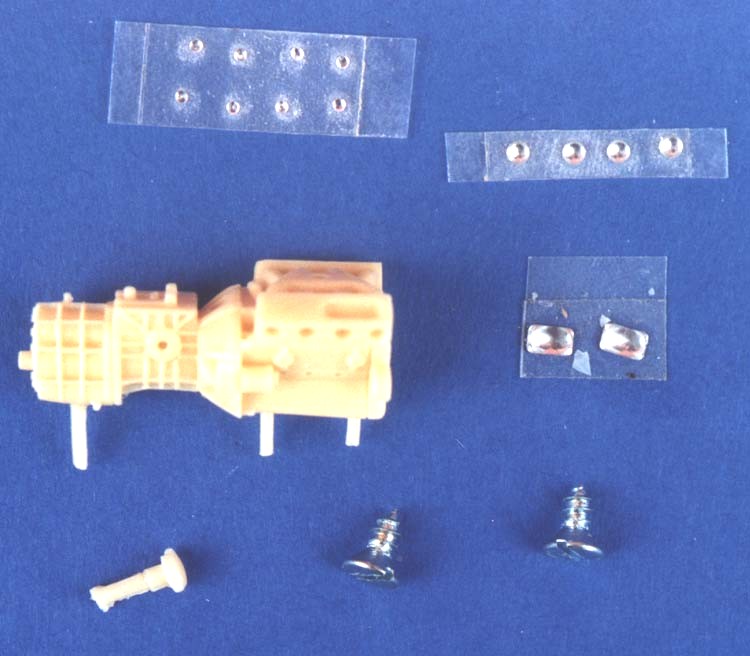
The main castings (engine block plus transmission, main body with fixed front, but open doors, access hatch at the front and open engine bay, plus chassis) are crisply moulded in resin. Flash is minimal, and in easy enough to reach places like window openings, air intakes and lower body sides. My main body casting had some bubbles very close to the surface of the resin, and I prefer to open these up using a fresh #11 blade, and fill them with gel-type superglue (« gap-filling » c-a glue).
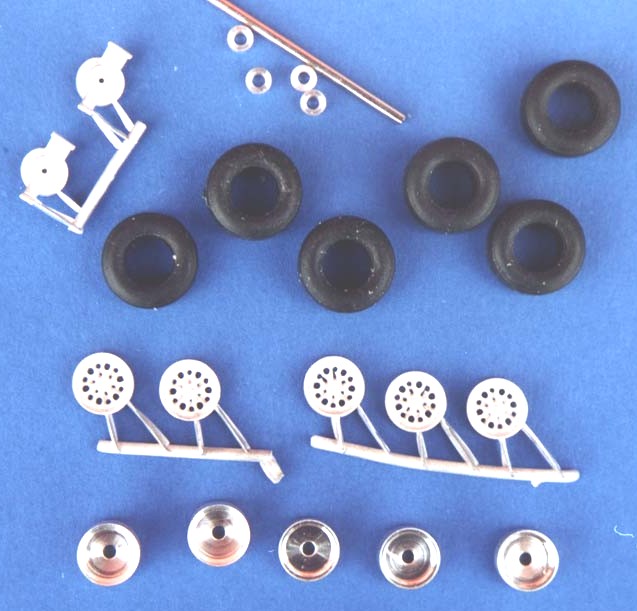
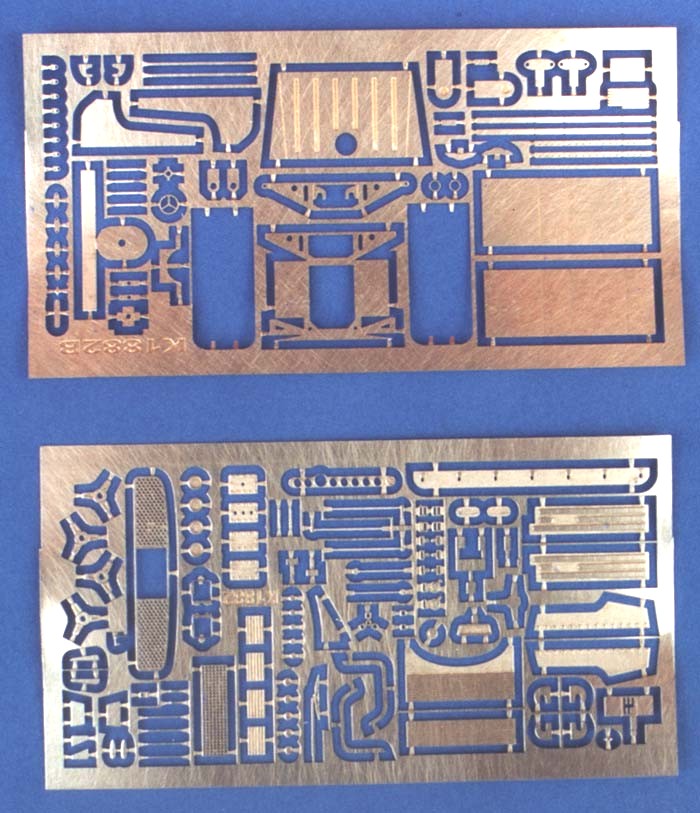
Turned metal parts include 5 wheels, and 4 rings which at the time of writing I had not yet identified. There are two large p-e frets which comprise not only the usual suspects like grilles, bonnet clips and fasteners, wipers and suspension details, but also the mandatory luggage boxes, etc. are fairly well detailed. They look indeed very comprehensive, but all the parts are made in the same gauge of steel; some of the finer grilles and detail parts would have looked better in a finer gauge of steel.
Decals are typical PM style: Very crisp and fine, comprehensive and with strong pigment. Tires are real rubber, and are not the usual generic one size fits them all, but look like they have been done especially to suit the Mk.II. They are slicks, though, not the beautifully sculpted Firestones that were used in those days. I have always thought it was funny that some really cheap die-cast F1 cars of the era have properly sculpted (treaded) tires, but then again, they are produced in tens of thousands, and not in hundreds only like these kits.
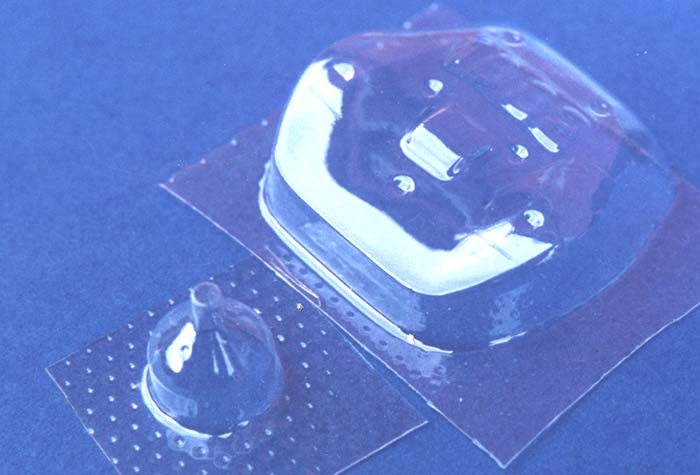
There are clear vac-formed headlight covers and intake/carburettor funnel (two sets of each); the front screen, side windows and rear window/deck are flat printed acetate, and one set is included only. Also included are three different gauges of wire, and 2 fixing screws to fix the undertray to the main body.
The instruction sheets are 3 pages, A3 size, with detailed description plus full colour pictures of a model in progress with lots of detail-shots and what looks like elementary hints and tips in the captions, plus pictures of the finished model. Two of the sheets are identical, except that one has French text, while the other is in English. Humbrol Colour references are given, and this time they seem to be comprehensively assigned to the individual parts during the build process.
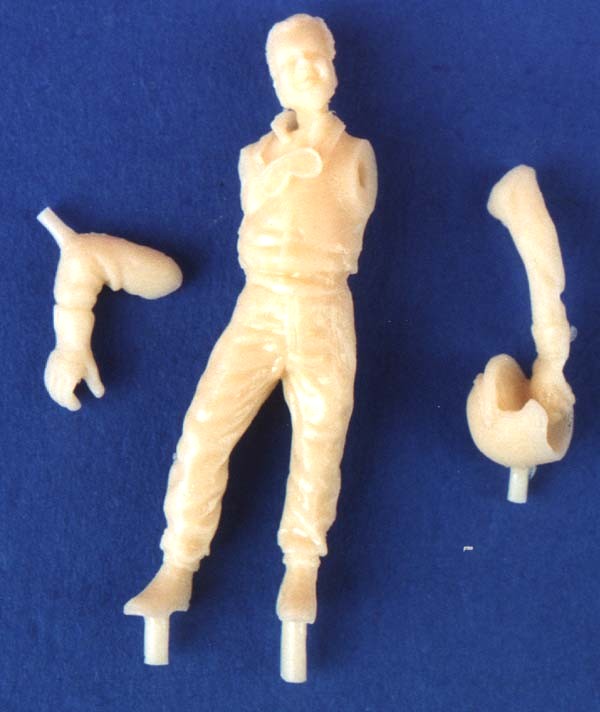
A driver figure is included, cast in resin; it looks quite good, and has a slight resemblance to Michael Schumacher actually! I’m not yet sure if I’m going to use it, or not, especially as the figure seems to salute the crowds that cheer to his victory, which would mean that the car has to be weathered to an after race look. Maybe I’ll set it up in a pre-race shake-down test, with a simple mechanic figure.
First impressions, assessment and some planning The cockpit section, engine “cradle” bearing and nose of the car are moulded in one piece. The doors are cut open, and are featured as separate items, with special castings to add to represent the inner side of the doors. The engine deck / rear of the body is a separate part too, as is the access panel from the front. The open panels are not meant to be operable. The engine deck and front access hatch might be made to fit (they do dry-fit very convincingly), but the doors have no mechanism whatsoever to make them open and close – you will either have to scratchbuild your own working mechanism, or chose whether to glue them into place in open or closed position.
The shape of the main body parts looks very convincing at first sight. I never take measurements of the models I build. If it looks right, it is right. I have the impression that the air intakes at the front might be a bit too small – from period pictures and pictures of the (meticulously) restored car it seems that they should go further down and thus give the car an even more pronounced sniff the tarmac look, but I’m not too sure about this. Anyway, as it is a black car, it will be difficult to notice on the finished model.
On my sample, there are a lot of small pinholes or air bubbles on the edges of the larger resin parts. Especially the edges of the doors and the lower body sides showed some nasty air bubbles directly under the surface. I prefer not to take my chances with these, because sooner or later on of them is likely to show under the body colour. Thus, I will pry these air bubbles open with the point of an X-Acto #11 blade, and fill them with c-a glue.
It all looks like it will build with ease into a great model. As opposed to earlier high detail kits by PM, many of the small detail parts are no longer cast integrally with the rest of the machinery, but come as separate castings and etched pieces. Of course this means that more clean-up, dry-fitting and assembling/aligning work has to be done, but the end-result is much better than with the one-piece castings.
As for the paint-job, I guess that’s going to be a hard nut to crack. Black is a difficult colour to get right, especially when using automotive spray cans. Many very light coats will be needed to get good coverage on the edges. This inevitably results in orange peel and quite dull paint, which means that careful sanding will be needed to cut the colour surface down. Polishing out the body will hopefully result in a nice even gleam, without too much gloss, without showing sanding and/or polishing marks, and without rubbing the paint off the edges ;-) ….
To be able to take my time with painting and finishing the body parts, I will pre-assemble the main components to check fit and alignment, and to carry out all necessary modifications (if any) before starting to paint the body. Then while I build, paint and detail the interior, engine compartment, etc. the body will be painted in several very light coats, and gradually sanded and polished to the desired degree of shine.
My main reference source is going to be the excellent book « Shelby GT40 » by Dave Friedman; I have several books on the subject of the GT40, but when it comes to period pictures and internals, there is nothing in my library like the Friedman book. Additional references include “The inside story of the fastest Fords” (Ludvigsen) and the 2 GT40 softcover books by John S. Allen, plus various magazines running articles on the GT40 (not always the Mk.II) and which come in handy to fill information gaps. Also, I have one of the Exoto 1/18th scale GT40/Mk.II’s, which can also help solve some of the smaller puzzles.
I have been reflecting on how to present the finished model, and I have not yet decided if I will put it in a small very simple diorama, or if I will present it completely removed from it’s natural environment, and just put the car and body panels on something like a polished aluminium plaque. I’ll decide on that later.
First thing to do now, is to decide which details I’ll want to change, replace or enhance. A very good starting point for this operation is to look at pictures of the built model, and compare them to pictures of the real thing. What’s the main difference between the two? Does the model look like the real thing, or is there something about it that looks different? What is it, then? The stance? The size and/or position of the wheels within the wheel-arches? Lack of, or excessive presence of small details like rivets, antennae, etc? Overall degree of gloss? Summing up Identifying points like these is very easy, but it is generally not so easy to improve it. I have spoiled more than one model trying to do this or that detail better than I had seen on somebody else’s model; maybe I even got that tiny little detail right, but I ruined the rest of the model in the progress ! Still I like to use this method, because it can also reveal areas that are problematic on the particular model you are building, problems which, through proper planning, can be avoided. |