Renaissance Integral Mclaren F1 GTR, Gulf Racing

by Rab Robertson


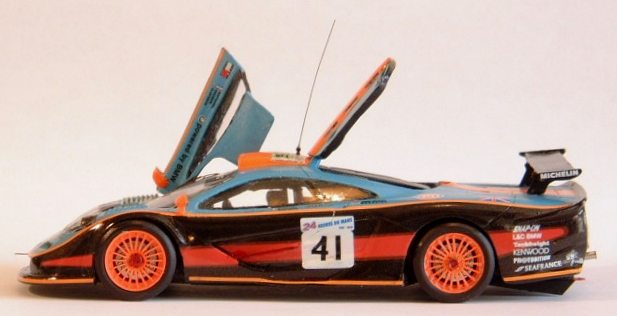
I first got into 1/43rd scale models about a year ago. I'd been building 1/24th scale plastic cars for years, but the lack of many of my favourite cars was frustrating. Where was the Ford RS200, the Lancia Stratos in Alitalia colours, the Lancia Delta S4, Clark's Lotus 49? I turned to the internet and soon stumbled across several websites selling kits of a range of cars, the breadth of which I could scarcely believe. At first I was sceptical, I mean how detailed could a Matchbox sized car really be? I ordered a couple of my favourite cars and found out just how detailed these kits were.


Recently I decided to build a Mclaren F1 GTR, preferably one of the Le Mans cars. A quick search revealed that there were several kits of this car, and the Renaissance Gulf sponsored GTR '97 model looked promising due to the open door. The kit was ordered and arrived a few weeks later.
I had a quick look at the parts and packed it away again whilst I built my then current model. When I came to build the model I checked the parts more thoroughly and found that the seat was missing. I emailed the supplier and they promised to send a replacement seat, in the end the original supplier took so long to send the seat that I ordered a replacement from Rae Dobbins at Merrymeet Model Cars which arrived 2 days later. So thumbs up to Merrymeet for supplying the seat and allowing me to actually finish the model.


05.jpg (30438 bytes)
02.jpg (31806 bytes)

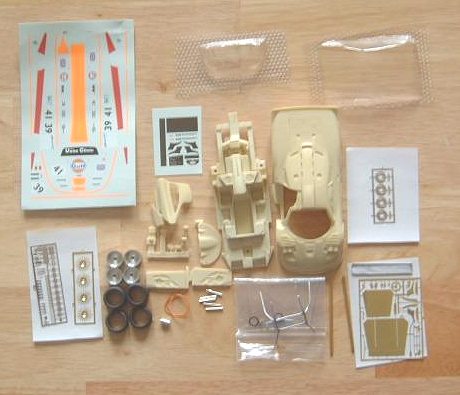
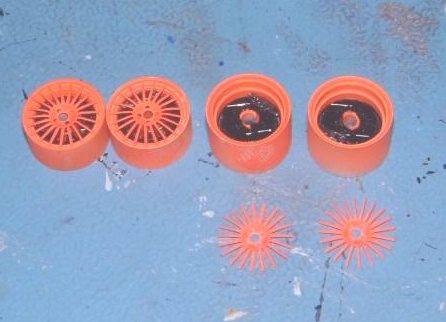
Checking all the bits

I laid out all the parts  and took a good look at what was there. The majority of the components were resin, with turned aluminium parts for the wheels, exhausts and the fire extinguisher, a white metal roll cage and rear wing and 4 frets of photo-etched parts. The instructions for 43rd scale kits were the biggest shock when I started building. In 24th scale models every component is shown, every colour is listed and step-by-step instructions and diagrams take you through every step of assembly. In 43rd scale you get a couple of black & white photo-copied sheets with a rough indication of where the parts go. The Renaissance instructions were average for this type of kit, 4 black & white sheets including a parts list/colour guide, some assembly diagrams and a decal placement guide.


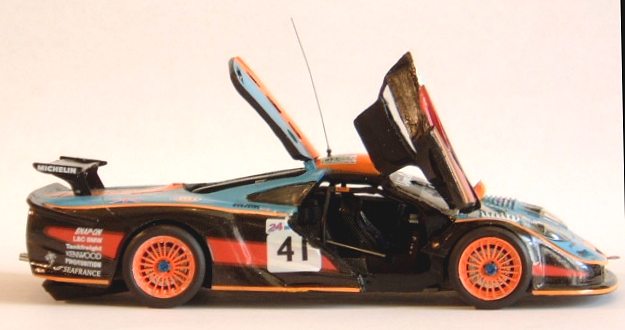
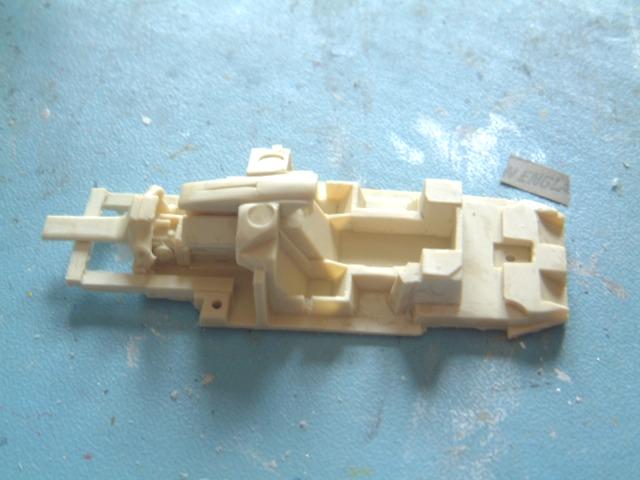
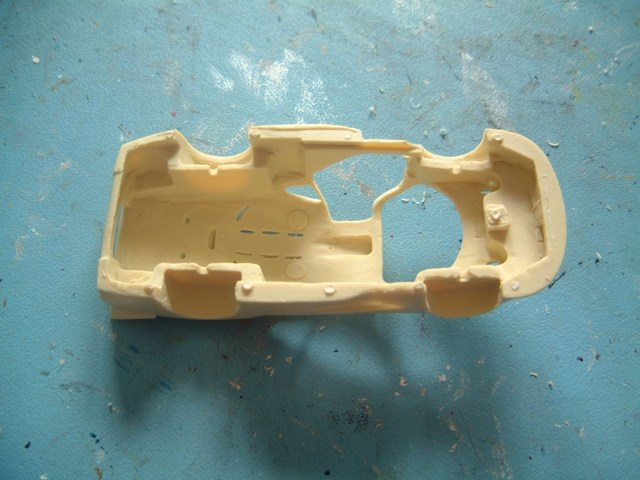
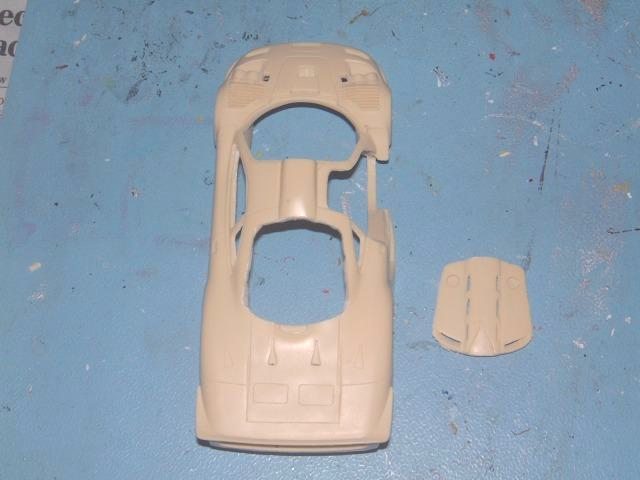
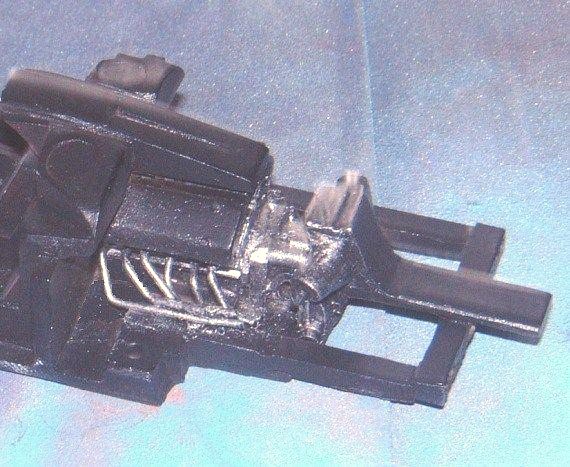
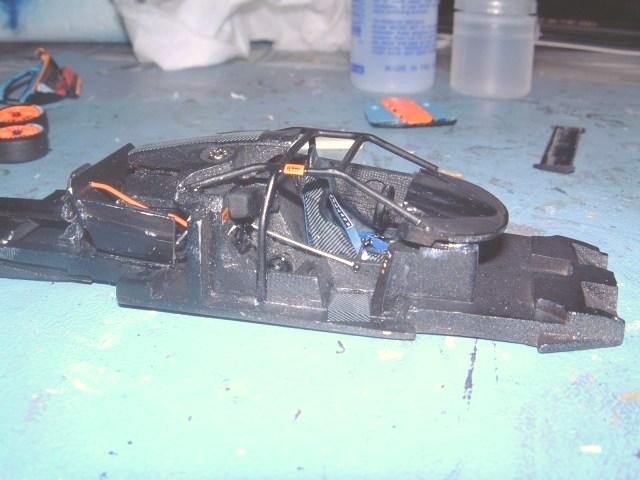
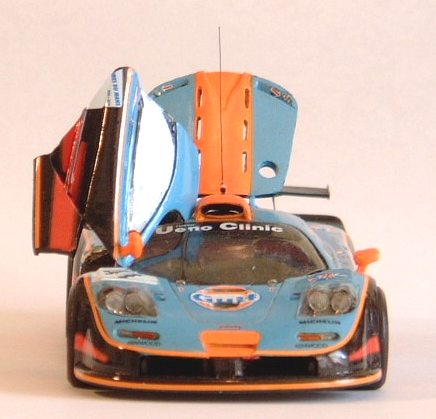
The resin parts were all very nicely cast, the body and chassis were particularly good, virtually no pinholes and only a small amount of cleaning was required . The chassis actually had the engine block and air intake moulded into it although none of this detail could be seen when the body was fitted, then an idea took shape. I could cut open the engine cover to reveal the detail underneath and in the process add a little individuality to the model.


14.jpg (36084 bytes)

15.jpg (60471 bytes)


The conversion process

I started out by scribing a short section of the panel line with a #11 blade until I'd cut through the resin and then went to work with some cotton thread, using it like a wire saw. After an hour or so of sawing and swearing I had completely removed the engine cover from the body . I decided to add a bit more detail to the engine bay, starting out with exhaust manifolds.

16.jpg (36519 bytes)

I drilled out the holes in the engine block where the exhaust pipes would fit and made 4 manifolds from paper clips (they seemed to be approximately the correct diameter) and put them aside for later. The removal of the engine cover meant that the ground could be seen through the gaps in the wheel arch so I built a simple bulkhead from 20 thou sheet styrene to hide the gaps.

17.jpg (27388 bytes)

The body shell required a small strut to be added at the rear of the engine bay to fill the remaining gap, this was made from a small piece of square sprue from the bits box.

18.jpg (30571 bytes)

The exhaust manifolds where then attached to the chassis and the side parts of the bulkhead were trimmed to make space for them. The rear venturi was made from 2 photo-etched parts and attached to the rear of the chassis. The entire chassis assembly was then sprayed matt black and the engine block, exhausts and transmission were drybrushed with steel to bring out the detail.

19.jpg (83293 bytes)


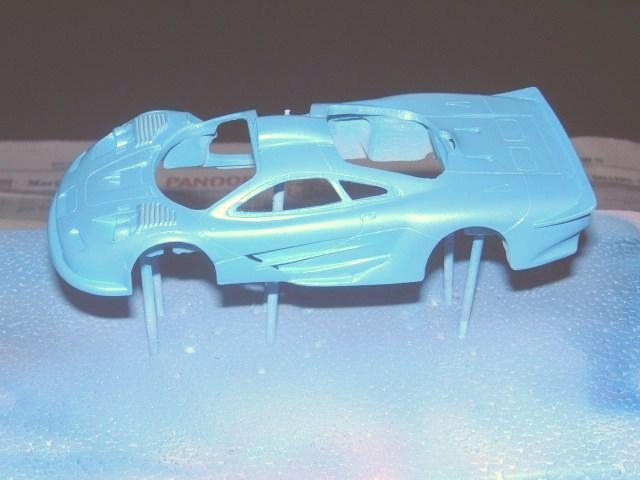
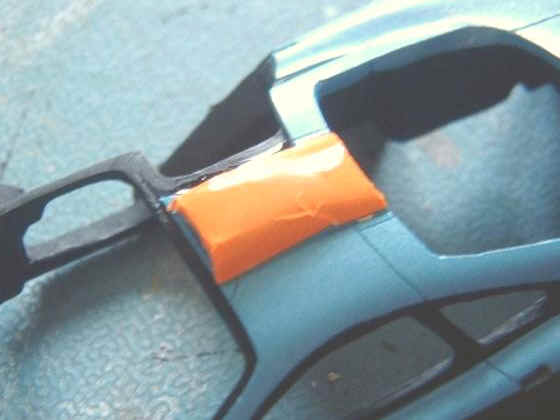
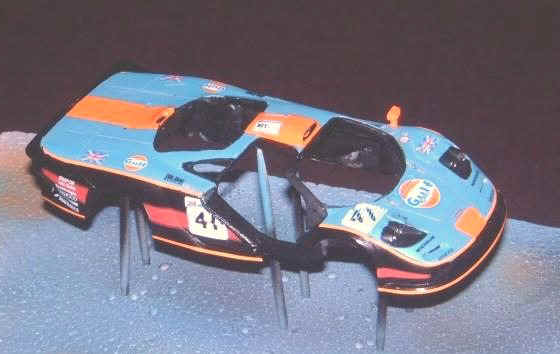
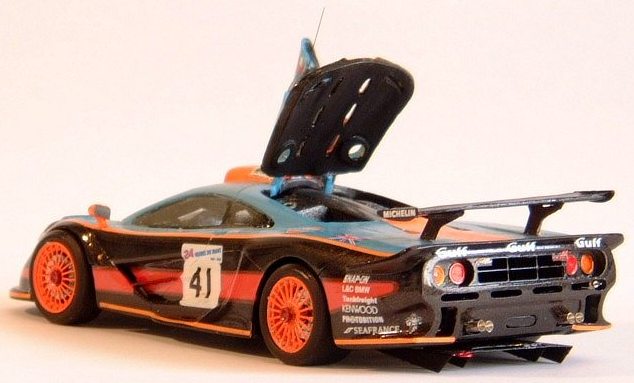
The Body shell

This particular car had a 3 tone paint job, a fluorescent orange stripe down the centre, blue deck and metallic brown sides and rear, obviously some masking was going to be necessary. The orange stripe was provided as a decal so, after washing the shell, I proceeded to spray the entire body in blue.
The instructions were rather vague on the precise colour of the blue, stating that an exact reference could not be given but that the blue was a pearlescent light sky blue. I hunted through my references and found various photographs on the internet, of course every picture showed a slightly different shade of blue so I picked an intermediate shade and began mixing paints. I used Lifecolor LC 58 gloss pale blue (Tamiya X-14) in a ratio of about 4:1 with Tamiya gloss white (X-2) and a small amount (about 5:1) of Winsor & Newton's pearlescent medium, thinned it down and began to spray.
The end result was pretty close to what I'd wanted, a nice pale blue with a pearlescent/metallic sheen to it. I sprayed the door and engine cover at the same time.


20.jpg (35949 bytes)

21.jpg (27082 bytes)


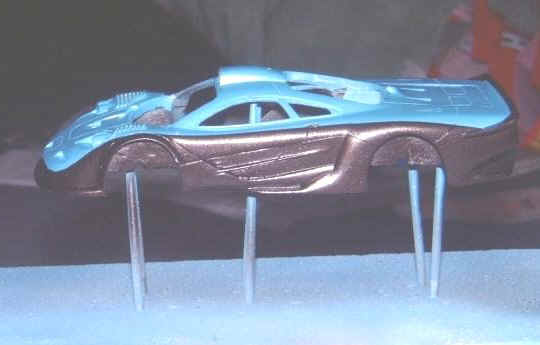
A bit of careful masking and I was ready to spray the metallic brown for the sides, the instructions gave a reference for this colour but rather than use the automotive paint I got a sample and mixed up some acrylics to match it. I prefer to use acrylics where possible, automotive laquers just don't agree with me. A mix of Tamiya Gloss Red (X-7) and Tamiya Gloss Black (X-10) in a ratio of 2:1 gave the right tone and the addition of Tamiya Flat Aluminium (XF-16) in a ratio of 5:1 gave the metallic edge I wanted. After spraying and removing the mask the body was starting to look like the real thing (pic10), the sides look almost black in the photo but in real life they were a very deep brown.


The next stage was to apply the fluorescent orange decals to the body, starting with the wide stripe that runs the length of the car. The nose and tail sections went on easily (although the tail stripe had to be cut to fit on the removed engine cover) but the section that fitted over the roof intake would not bed down properly. No matter how much Micro-Sol I slapped on it I couldn't get rid of those horrible wrinkles. After several, increasingly frustrating, attempts I gave up and dumped the whole thing in a jar of brake fluid to soak overnight.


The following day I started again, I attached the engine cover to the body using masking tape on the inside of the shell and sprayed a wide orange stripe down the centre of the body, the orange was Lifecolor LC23 matt fluorescent orange mixed with Winsor & Newton's acrylic gloss medium to give it a bit of shine. A bit more masking and I sprayed the blue, more masking and I sprayed the brown then put the body aside to cure.


Back to the chassis

The wheels were sprayed the same subtle orange as the body, the brake discs and callipers were added and the whole lot glued together (pic12). The other components were then added to the chassis, the fire extinguisher, the timing gear and the roll cage were all painted matt black. The seat and dashboard were painted satin black and the seat had its carbon fibre decal applied as well as its harness made from electrical tape and photo-etched buckles. 

10.jpg (25184 bytes)

The dashboard decals were then applied and the steering wheel attached.
The minor components were all attached to the chassis and the roll cage and dashboard were dry fitted, it was at this point that I noticed that the dashboard wouldn't sit properly. The dash had a couple of lugs on the underside which located onto the chassis, but when the body was fitted there was a huge gap between the edge of the dash and the windscreen.

If the dash was moved forward to fill the gap then the locating lugs caused the front to lift up causing an unsightly gap and obscuring the driver's view. In the end I cut the lugs off the dash so that it would sit flat on the chassis.

11.jpg (44219 bytes)

Additional engine bay detailing was added with bits of sprue, some wiring and a small resin piece from the kit that I couldn't identify and wasn't mentioned in the instructions and some carbon fibre decal was added to the airbox. In the end the exhaust manifolds aren't really visible from above, but I know they're there and that's the main thing.

12.jpg (52489 bytes)

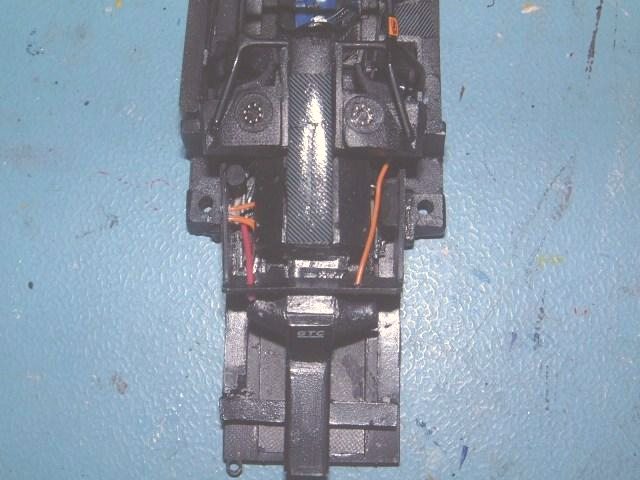
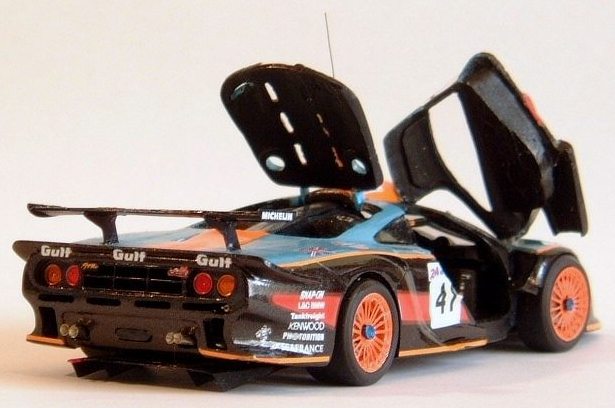
 The turned aluminium tail pipes were then fitted into their appropriate positions on the back of the chassis, completing the chassis assembly.


Finishing the body

By this time the paint on the body had cured so after painting the window frames and interior in matt black it was on with the decals. The rest of the decals were applied with no problems, although many of the decals on the right side of the car had to be cut into sections because of the open door.


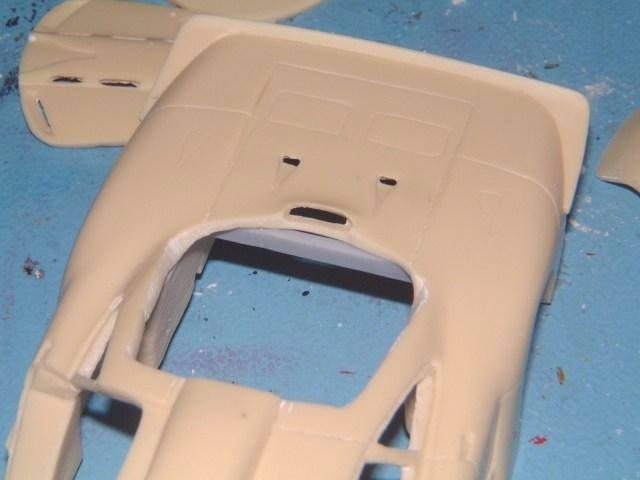
The number decal and the union flag that were applied over the vents on the front wings were cut into individual strips and applied one at a time. Some what time consuming but the end effect is very nice. Once all of the decals were applied the door was attached and 2 small slots were cut into the roof to allow the engine cover to be mounted.
The vac formed windows were then attached from the outside using Mico Kristal Kleer, as were the headlamp covers.


Putting it all together

The axle rods were cut to the correct length with a rotary multi-tool (best time saver I ever bought) and the wheels and axles were fitted to the chassis, making sure that the coloured wheel nuts were on the correct side (red to the left, blue to the right). The final step was to fit the chassis and body shell together.
At this point I hit a slight snag, the exhausts had to protrude through slots in the rear of the body but I could not get them to fit. 

04.jpg (30859 bytes)

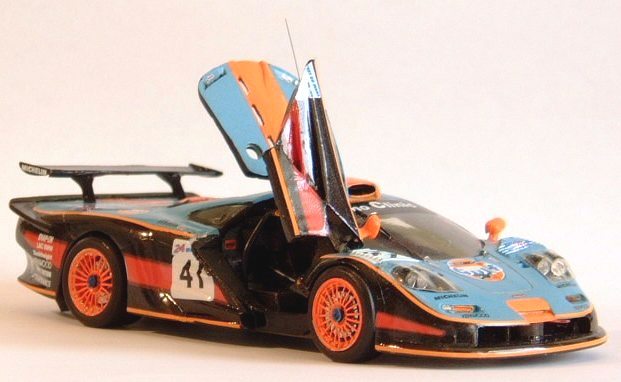
No amount a jiggling could get the chassis into the body at a shallow enough angle to allow the exhausts to pass through the slots. In the end I removed the exhausts, fitted the body and re-fitted the exhausts with the body in place.


Overall the kit went together fairly easily, apart from the weird fit on the dash, the roof intake decal not bedding down and the exhaust pipes, no real problems were encountered and I think the end result is a very nice looking model, especially with the additional detail of the open engine cover.


01.jpg (45633 bytes)

03.jpg (39216 bytes)

06.jpg (42448 bytes)