|
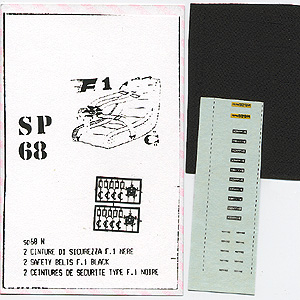
Actually the seatbelts by Tron are the best on the market. There are several types, but I'll describe here the one for the Formula 1 cars. The ones who want less hard-working seatbelts have to buy Tameo's or other manufacturers', that are also nicely made. But the realism of Tron's seatbelts is something different, even though they're hard-working to built, especially the set SP82. In the package there are the photoetched parts beside the "instructions", the seatbelts made of adhesive cloth and the decals of the most common brands. I decided to explain how to build them because the instructions in the package are completely insufficient. Unfortunately Tron as well as Tameo and others, commissions the photoetches to third persons, but he should arrange a quality control on these parts.
|
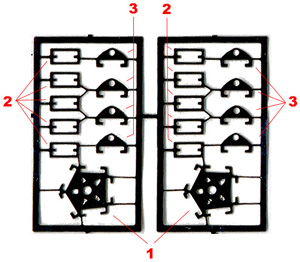
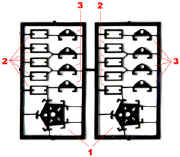
These are the photoetched parts
 1.-Locking plate 1.-Locking plate
2.-Strap for lenght regulation
3.-Seatbelt buckles
|
|
|
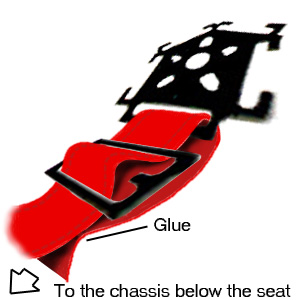
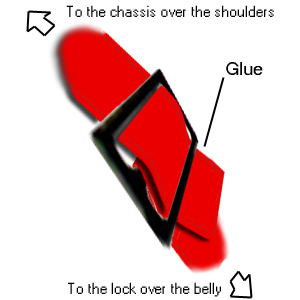
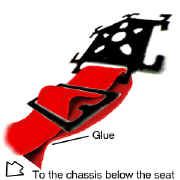
We can start assembling the seatbelts that are over the shoulders and on the sides of the driver, or the one who comes from below the seat. I start from this one. The adhesive cloth seatbelts are pre-cut so you can chose if to use them or to cut them by yourself. You pass the belt through the strap 2 being careful to not glue it and then pass it around the fastening on the locking plate 1. Pass the head of the belt back through the strap 2 or below it, since it won't be possible to see it once they're finished, due the tiny dimensions. You can paste the belt to the other without glue, being these adhesive, but you can use a tear of CA to fix it to the seat.
|
|
|
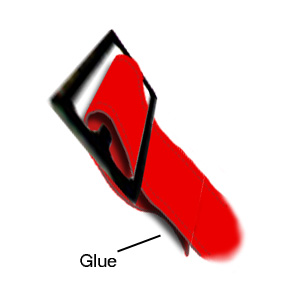
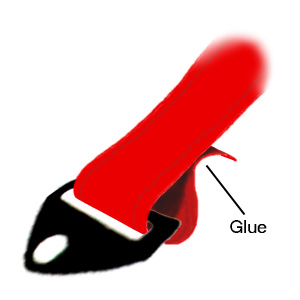
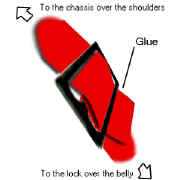
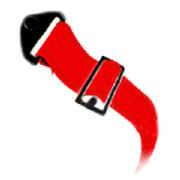
Let's assemble the part that goes from the strap 2 to the buckle 3 that it locks on the locking plate 1 located over the driver's belly. Pass this one through the strap 2 and bend it to the under surface gluing it. You can use a tear of cyanacrilate, though.
|

|
|
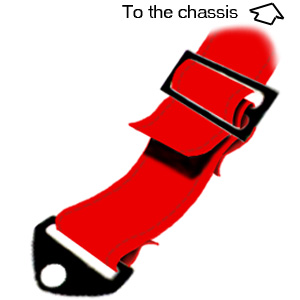
Pass the belt that comes from over the driver shoulders through the strap 2 and glue it to the one already fixed that goes to the locking plate 1.
|
|
|
Pass the head of the opposite side of the belt glued on the strap 2 through the buckle 3 that locks on the locking plate, and paste it.
|

|
|
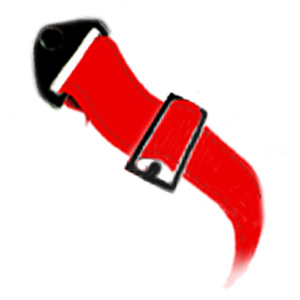
Here's the seatbelt for the chest as it appears, once assembled.
|
|
|
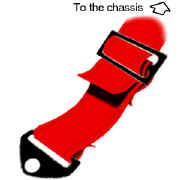
This is the belt for the hips. It's made of just one piece, differently than the ones for the shoulders. It passes through the strap 2, goes through the buckle 3 and glues on the opposite face of the belt without going back to the strap 2.
|
|
|
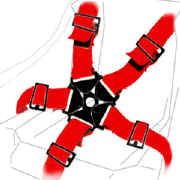
Here are the finished seatbelts. The only belt without locking buckle is the one coming between the driver legs. Now apply the decals; use a little softener liquid to better let the decals stick to the cloth. You can leave the seatbelts open or close depending on your taste. A very big mistake it's the set is incomplete, as you can see from the illustration. The locking trigger over the plate is completely missing. You need to scratchbuild it with very thin metal, or you can get it from another set. This is a lack that Tron should point out to the one who produces the photoetches. However, once built the seatbelts are the best around without any doubt.
|
|
|