|
Despite the fact that I have been building models for a long time, I had never attempted anything 1/43 scale. In the last few years with the arrival of the internet and the wealth of information, I began to think that 1/43 just might be something I would enjoy. I had often visited Peter Radcliffe's Merrymeet Model Cars and the Amazing 43 websites and although I knew that 1/43 scale offered the greatest number of my favorite F 1 and LeMans subjects, it always seemed that my first 1/43 project never got closer than the one I was going to do next.
This pattern would probably have continued, but it would be my good fortune while I was on a business trip to meet my internet friend Michel. I am quite certain that the hotel security was looking at us closely as it was probably a first in Amsterdam that two grown men were playing with model cars in the hotel lobby at 2 o'clock in the morning. The object of our attention was a fractional part of his 1/43 Alfa Romeo collection and for the first time I had the hands on opportunity to appreciate the quality of what 1/43 scale had to offer.
Soon after my return home, I contacted Peter and he made a number of helpful suggestions. I could relate to his recommendation that I focus my kit selection on a central theme after I recalled my wild assortment of aircraft kits. Not wanting to repeat my past mistakes, I decided that I would use common sense and restrict my 1/43 selections to Ferrari.
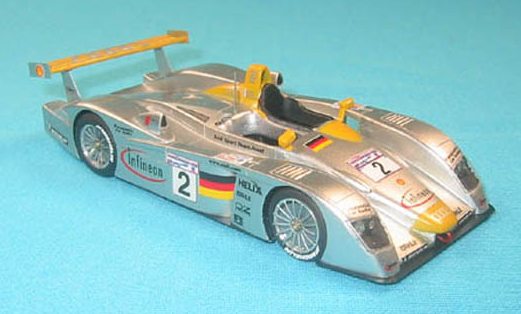
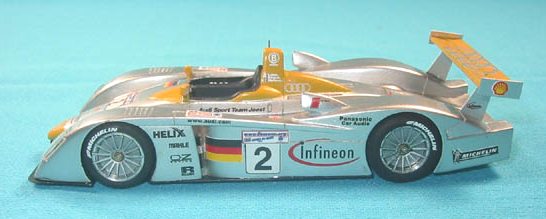
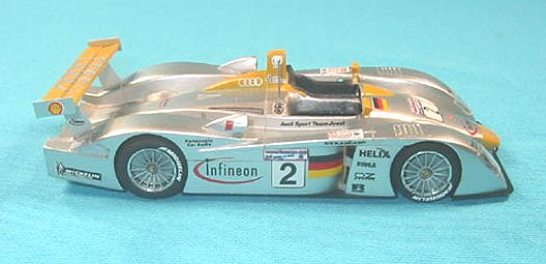
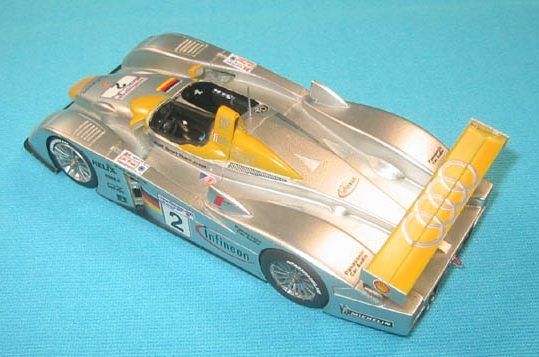
Approximately the same time I sent my Ferrari shopping list to Peter, another Michael had joined our model club and it turned out that his favorite scale was 1/43. I explained that the 1/43 division consisted only the two of us and he was the leader since I didn't even own a 1/43 scale model. He obviously realized that he needed to correct that situation because the next time I saw him, he gave me a Provence Moulage Audi R8R kit. That was the end of good intentions as I went straight home and I was cleaning off the mold release before I went to bed that night. Audi may not be Ferrari, but this kit shot straight to the top of the project list.
In the beginning...
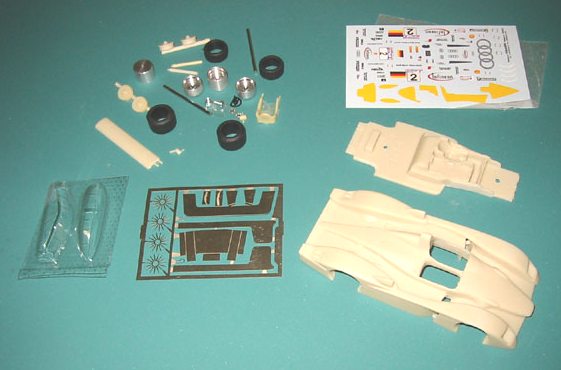
My first serious introduction to the world of 1/43 arrived when I looked at the one page instruction sheet and realized there was no page two. The six color photos of the finished model was excellent for positioning the decals, but the sum of the assembly instructions consisted of a small isometric blow up drawing. I actually found it refreshing not to have the instructions tell me to paint the tires black, but later I had my fingers crossed when I glued the bottom plates on the front and sides that I was putting them in the correct position. I long ago realized the importance of proper reference material and it was apparent that this is especially true in the world of 1/43.
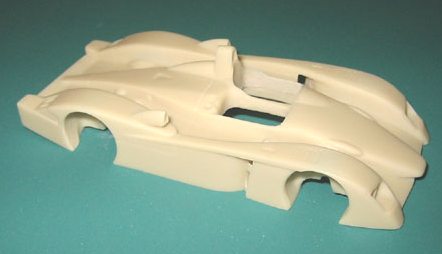
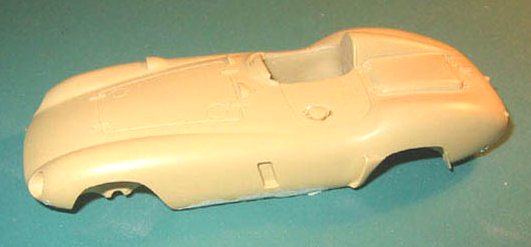
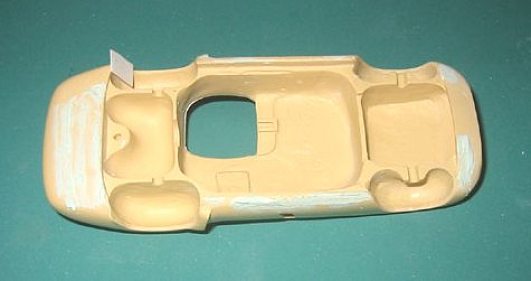
I cleaned the mold release from the resin parts with Bleche Wite followed up with second scrubbing using liquid dishwasher soap. The molding was excellent with a minimum of parting lines and flash. I airbrushed my usual Floquil gray primer in very light coats. This provided a contrasting color to aid in sanding and provide a base for the paint adhesion. I felt it was obvious that the ability to create a resin casting with fine detail might be an advantage in 1/43 scale, but this could be easily lost under excessive primer. The primer was sanded with 3200 Micro Mesh cloth and the body was washed with a mild solution of warm water and liquid dishwasher soap. During the sanding and priming phase, I make it a practice to wash my models and scrub with a tooth brush after each sanding session before painting again to remove all traces of the sanding dust. I found that
this was especially important in 1/43 scale as sanding particles appeared like boulders when I attempted to save time and eliminated the bath.
|
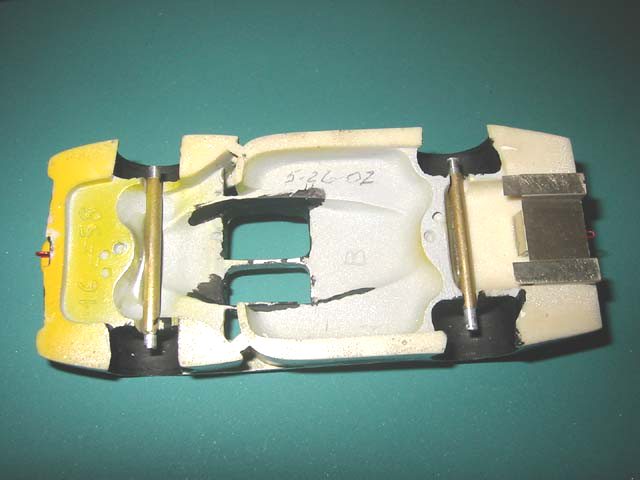
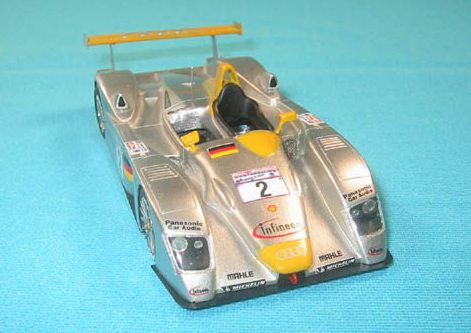
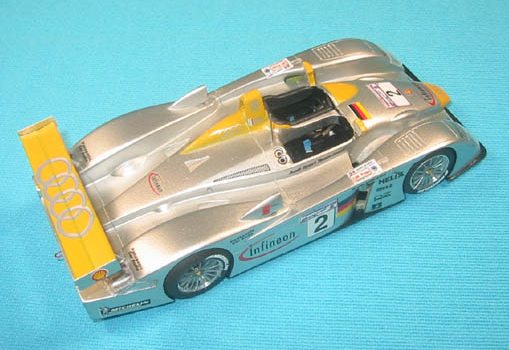
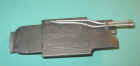
I replaced the kit axles with 1/16 O.D. aluminum tubing and mounted 1/16 I.D. brass tubing with 5 minute epoxy to the bottom of the body. Since I really hate it when my wife points it out when only three wheels are touching the table, I used the relatively slower epoxy and positioned the model correctly on the wheels before the epoxy set.
|
|
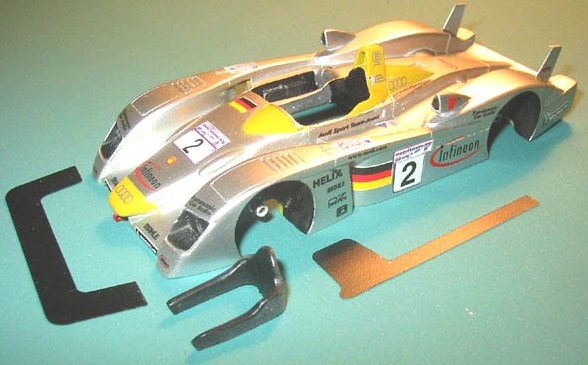
The rear bottom photo etched section, rear tow hook, and the rear wing supports were attached with superglue. The wire replacement I was forced to create for the front photo etched tow hook was also attached after the original from the kit was last seen two seconds after I attempted to pick it up with my tweezers.
Over the years I have used everything from hobby enamels and lacquers, to the two part automotive products. Each has advantages and disadvantages and my choice is based on the type of application or available color. The color I selected was Gunze Sangyo, Mr. Color #159 silver. Although I prefer working with lacquer, I hesitated because lacquer requires additional polishing. This may have been acceptable for my larger scale efforts, but this was the smallest model I had attempted using lacquer and I was concerned with the smaller multiple and difficult to reach areas. In the end I was satisfied, but I have to admit that it was the first time I ever polished a model with a half a cotton ball and cotton swabs on a stick.
Although the yellow decals were provided, because I had decided not to use a clear top coat, I painted the yellow areas and the rear wing Floquil CSX gloss yellow. After two weeks, I sanded the body very lightly with dry 4000 Micro Mesh and polished with #2 Nouvis. Fortunately the decals went on well without the need for the Solvaset or Micro Sol decal setting solvents. I simply wet the intended area with Micro Set to insure a clean surface and that was all that was required.
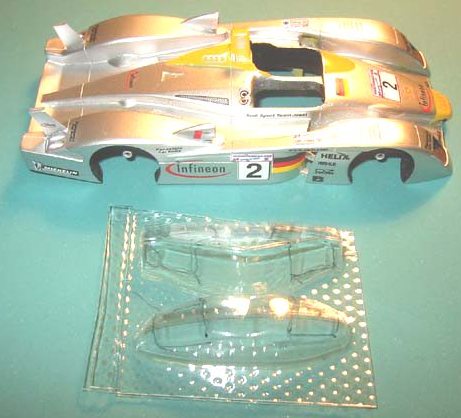
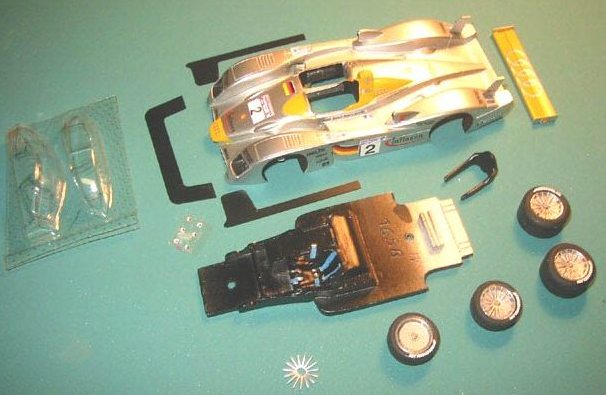
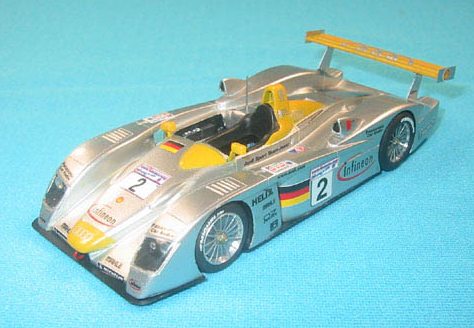
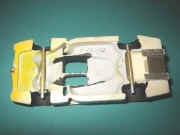
The photo etched bottom plates had been sprayed with a mixture of half and half Model Master flat and gloss black and were attached with 5 minute epoxy. The photo etched wheel spokes were painted with Alclad II aluminum and assembled. The interior was sprayed with the same half and half Model Master black and the little details were brushed on with various assortment of Tamiya acrylics. The front head light recesses, bottom and wheel wells are Tamiya acrylic flat black. I found the vacuum formed head and tail light covers in 1/43 scale no different than my experience with similar parts I use in larger scales. Fortunately the good folks at Provence Moulage were kind enough to include a double set of these vacuum formed parts as the old adage of practice makes prefect was all too true when the rear lens were cut and fitted. For attaching the clear parts, I used the
same as always Model Master Clear Parts Cement and Window Maker.
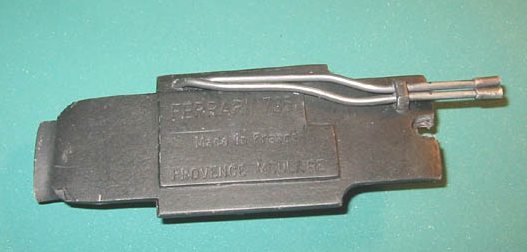
My first 1/43 effort turned out to be every bit as enjoyable as I hoped. Perhaps it was my previous experience with 1/72 aircraft or the comfortable weight of the resin, but I found that I very much enjoyed working on this model. Even before it was finished, I was sorry that I had not had done anything in this scale earlier. Meanwhile, Peter's shipment of Ferrari's arrived and I was back to the original Ferrari building schedule when I finished a Provence Moulage Ferrari 735 LM.
While I was still working on the Audi, a box containing another Provence Moulage, Alfa Romeo 8C-2900B arrived from my Alfa addict friend in the Netherlands. I suppose it's all right for it to come next as after all everyone knows that Enzo Ferrari was associated with Alfa Romeo.
As my friend Mike says, "1/43 can be infectious."
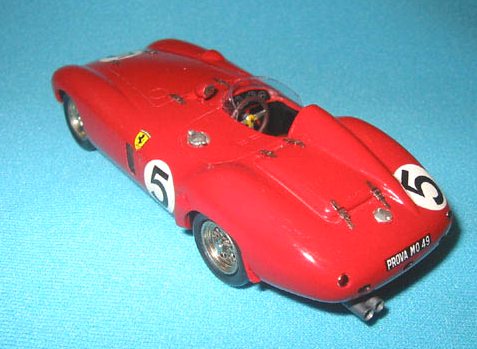
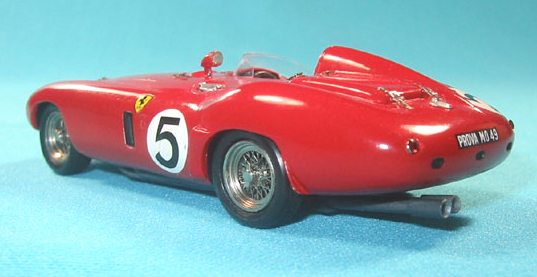
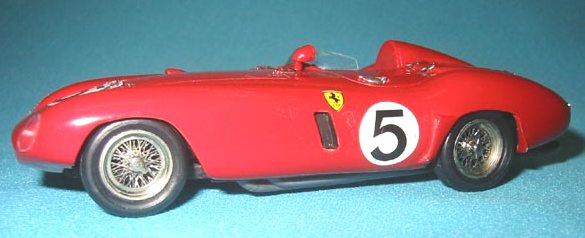
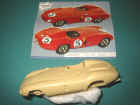
The Ferrari 375
|
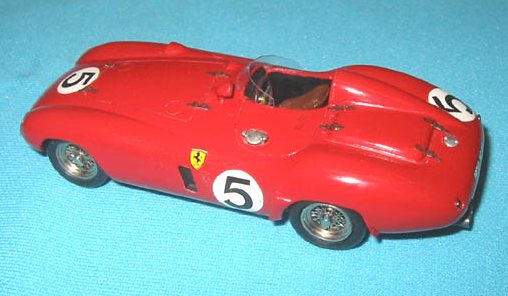
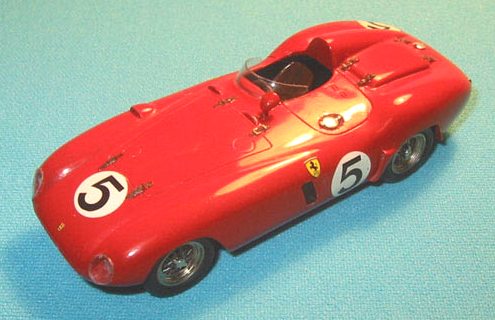
I enjoyed the Audi and went on to one of the kits Peter sent which was the Provence Moulage Ferrari 375 LM. It didn't take much more time to photograph it as well so I have included these with a brief description. To me this was even better and was a joy to build because after all Ferrari is my favorite.
|
|
|
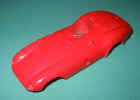
I followed the same construction procedure as with the Audi, but taking the tip from the Ferrari 375 MM article on A43 I removed the cast bonnet straps and tail lights and replaced them with Renaissance detail parts. This was painted with Floquil Soo Line gloss red lacquer and polished. This Floquil covers with a very thin layer and I managed to get it polished the way I wanted without going thru into the resin.
|
|
|
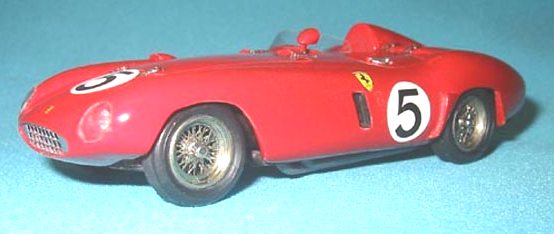
It had a somewhat dull and realistic finish similar to what I remember seeing at Sebring back in the early 60's. I can specifically remember seeing the
Ferrari 250 GTO Breadvan and it looked like it had been painted with a red primer.
|
|
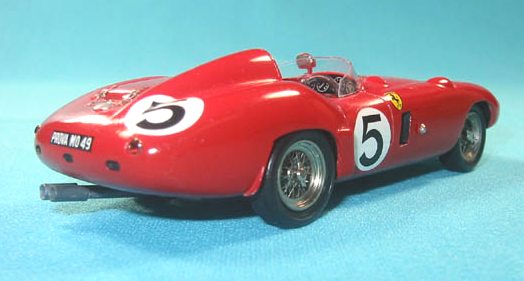
Unfortunately I had a problem with the decals separating from the paper and the result was no adhesive on the decals. I felt I had no alternative and so I covered the whole thing with gloss and had to polish again. As far as I am concerned that was just a lot of unnecessary effort that filled in some of the surface detail.
I got the idea from the same 375 MM article and I replaced the exhaust pipes with a vinyl covered wire. This was primed and painted with Humbrol 20003 Metal Cote. I have used this Humbrol series on a detailing engines and frames and I am very pleased.
I honestly can tell you that I enjoyed every minute that I worked on this model. Now that it's finished, I can see a number of places for improvement and so next time will be better.
|