|
|||||||||||||||||||||||||||||
|
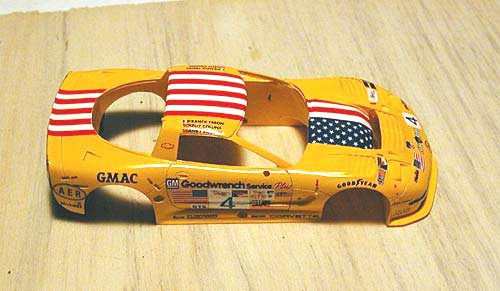
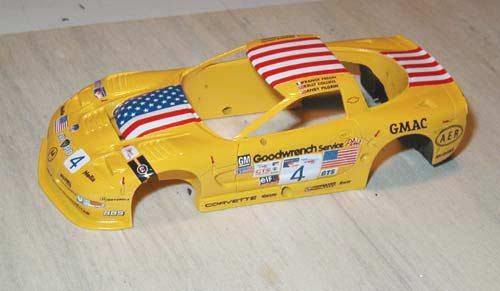
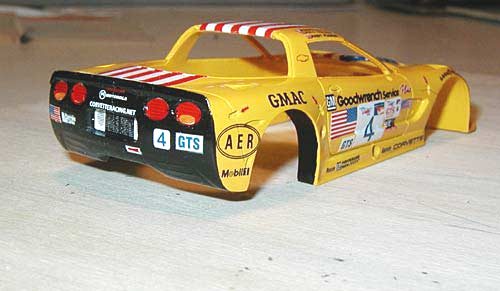
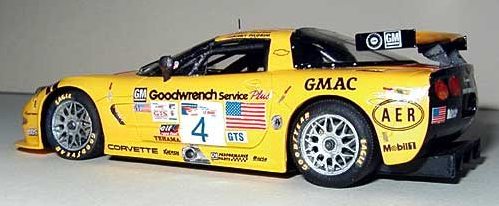
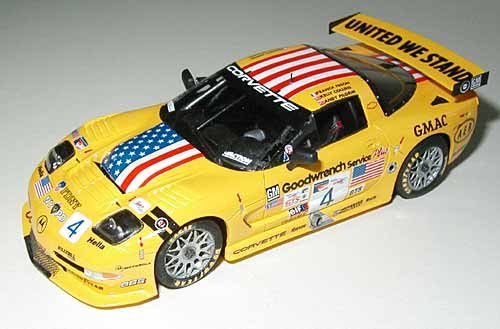
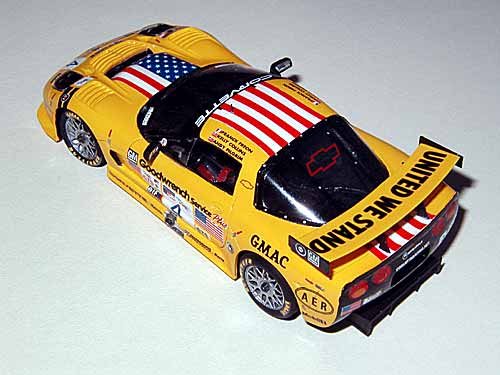
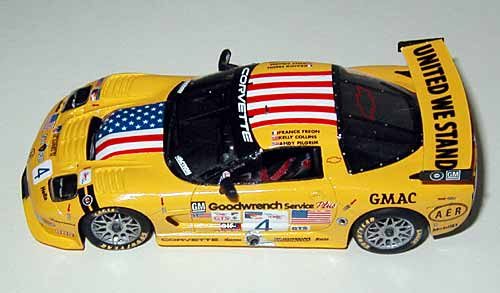
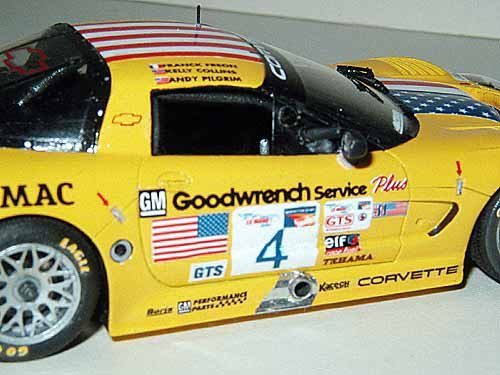
As one gets further involved in building 1/43 scale kits, you tend to want to make changes, enhance, and put more of yourself into building a kit. It starts with little things, like adding better seat belts, making disk brakes, buying better wheels, or adding bodywork clips that you feel should be included in every kit. It is simply more fun to put your stamp on building kits. I do find that some kits are built more for the immediate gratification one gets from building a kit, but others are built with more interest in a certain subject. I'm not necessarily a huge fan of the Corvette, but I am glad they are involved in racing in the American LeMans Series and racing at LeMans. I like the shape of the current Corvette, so it was only a matter of time until I would get around to building one. While communicating with an Internet modeling/racing enthusiast friend, we thought the Petit LeMans version would be of interest to us. I work in the Graphic Design industry. Since I am in Photoshop and Illustrator all the time, I didn't think it would be a problem to draw the decals that would be necessary to modify the 2001 LeMans car to the unique Petit LeMans version.
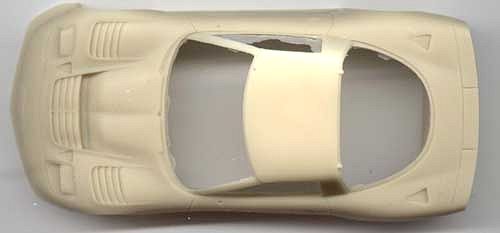
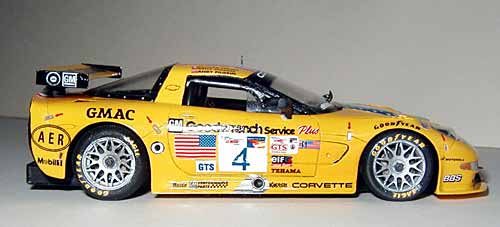
The Kit The Provence Moulage kit is made up of the normal formula of parts they provide. It has a resin body and chassis, as well as rear wing, seat, wheel inserts and steering wheel. The photoetched parts include wheel spokes, wing end plates and supports, the vent/back-up lights for the rear bumper, and the tow hook. The usual assortment of headlights, tires, turned wheels, 2 sets of vacuum formed clear parts, and axles are also included. Building the Interior
The interior was built up first while the decals were being drawn. I made my own roll cage based on photos I found. Provence Moulage didn't provide any parts for this. They did cast in the bars on each side between the instrument panel and rear bulkhead. But I removed them, since they would need some cleaning and the rest of the cage would need to be built. After I had painted and built this up, I decided to remove the vent hoses on the rear deck. I would recommend doing this at the beginning since they are not there in the 2001 car.
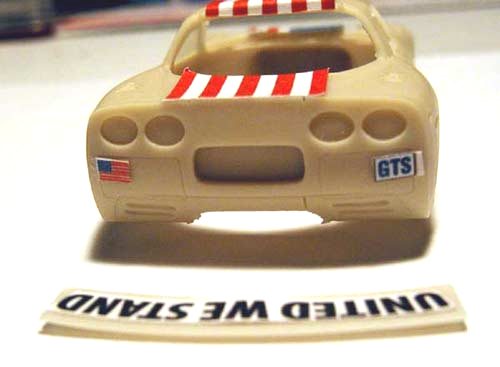
I painted the wheel aluminum and attached the nut to the spoke assembly. Then I made my own caliper out of either aluminum sheet or plastic sheet. I can't remember which, I've used both in the past. I've made my own disks also, but I have bought aftermarket parts from Renaissance and used Making the Decals To make the decals, I first scanned the body from the top and the side. I then imported the scans into Illustrator to serve the purpose of a template to draw on. This way the decal sizes don't need to be measured constantly. I don't even need the model in front of me while creating them. I also made a copy of the instructions to determine what decals can be used from the LeMans version and what needs to be drawn.
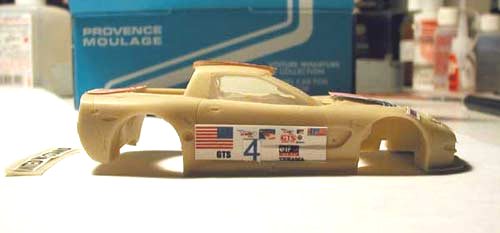
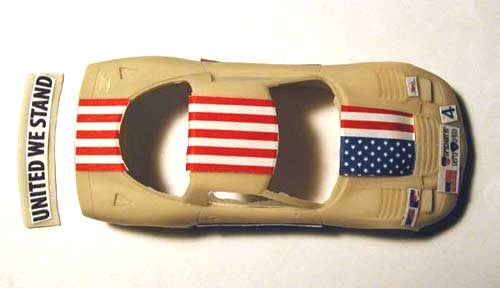
I made quick drawings pointing to the placement on the car as a reminder. Then I went about searching for necessary logos on the Internet. I just needed a GIF or JPG so I could trace what was needed in Illustrator. All drawings were made large, then reduced to the correct sizes. Then I organized them on top of the scanned car until I all of them were in place. When finished, I did a print out on paper to have my first look at them. I cut them out and, using double-stick tape, applied them to the model to check sizes. After making adjustments, I was ready for the real decals. Finishing the Kit I finally prepared and painted the body. I opened up the large vent on the hood/bonnet, and drilled open the exhausts to replace with tubing. I also opened up the vent at the front, but I wouldn't bother with this again since it is covered with the mesh. I had plenty of time to do this due to printer difficulties and finding white ink cartridges for an Alps printer. I finally used my inkjet printer with white and clear decal paper, since I didn't solve the problems with the Alps printer, yet. It has problems handling the cartridges. The white decal paper meant that all of the decals needed to be cut to the size and shape of the decal. I applied my decals first, in case they didn't work out. That way I could revert to the LeMans car. Summing up After months of waiting, I finally could see the results. The decals were not too much trouble to apply with some careful handling. After a couple coats of a not too glossy clear, I could finish assembling the kit. I added a mesh at the front from Tameo's line of parts, and The clear parts fit with no problems from the outside and the chassis and body were screwed together. The last of the decals were applied and finally the mirrors, antenna and windshield wiper were attached. After many months, I was finally finished. Now all I need to do is make space for it.
|
|||||||||||||||||||||||||||||