|
||||||||||||||||||||||||||||||||||
|
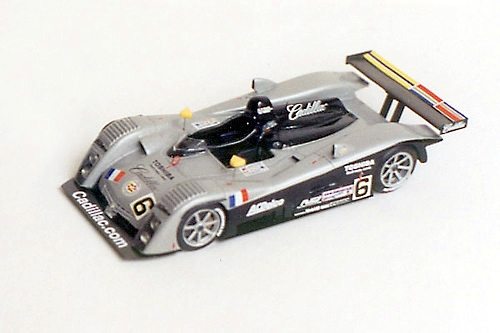
This is the second year of the Cadillac LeMans program. They got a late start with deciding to keep going, so the 2001 car is an update of the 2000 car. Still more speed and reliability is needed. But one must respect them for keeping the project going. LeMans 2001 stastics:
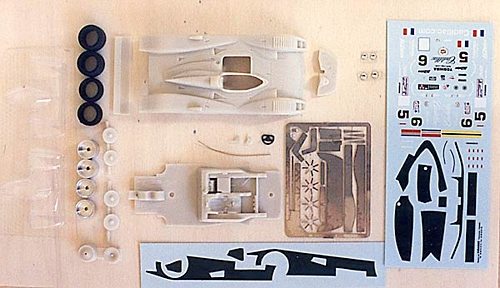
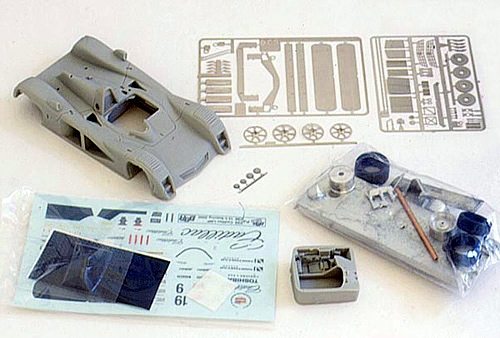
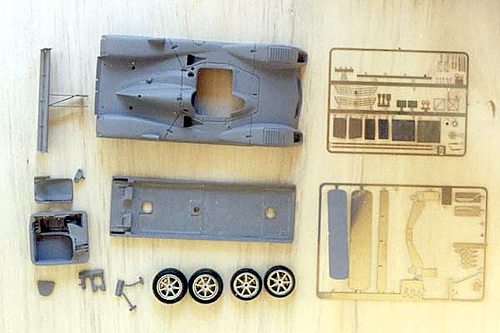
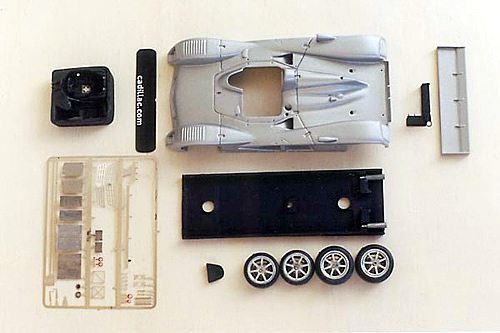
The Parts
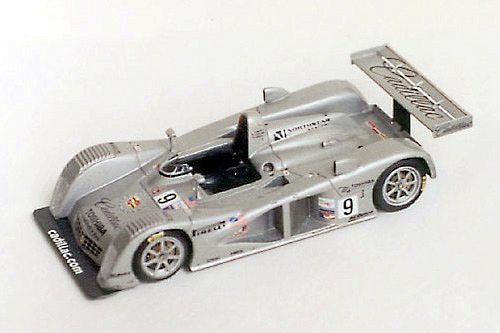
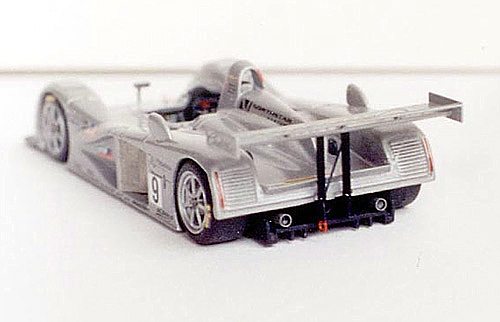
The body, chassis, rear wing, and mirrors are in resin. Wheel spokes, rear diffuser dividers, wing support and tow hooks are photoetched parts. Vacuumed formed wind screen and headlight covers are included, as well as headlights, turned wheels, and a wire that I expect is for the mirror supports. But I'm just guessing on that one. Beginning The approach for a Provence Moulage sports car kit is almost always the same. I like to start with inspecting the parts as you clean off any flash on the resin. I also like to compare with any photos I may have, so I can start asking myself questions to see if I want to change anything. Test the fit of parts and get an understanding of how the interact with each other. This isn't usually an issue with Provence Moulage, but sometimes they throw in a part that isn't explained on the instructions. Prepare for Painting The resin parts have been cleaned of flash and sanded. Any parts that should be assembled before painting is done now. For this kit, the rear wing end plates were attached to the wing since they are all black. The resin wing had no place marking where the wing supports attached to the wing. I decided to add a piece on the bottom of the wing to make it stronger. It really shouldn't be there, but I thought it would be stronger than cutting slots in the bottom of the wing. Painting
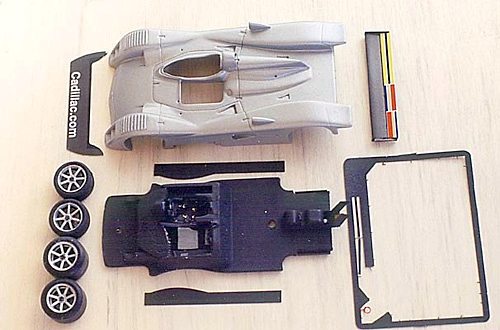
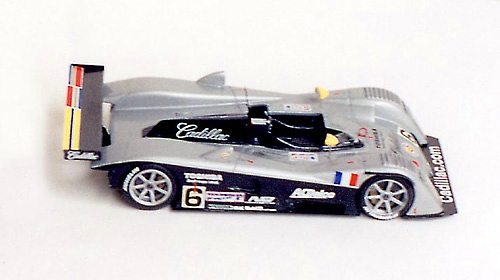
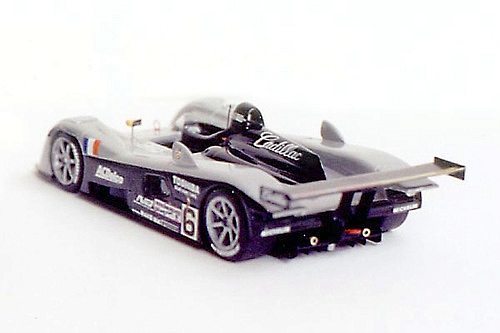
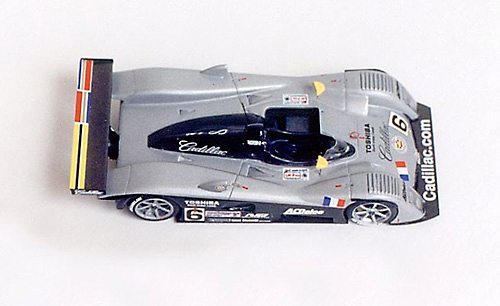
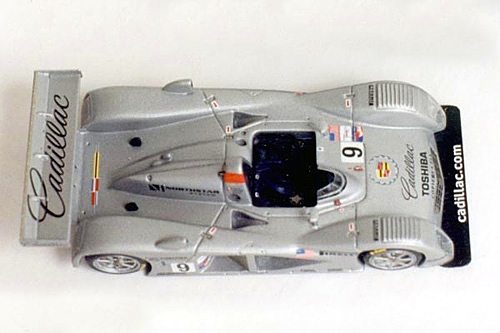
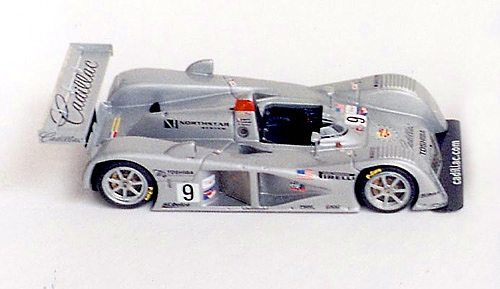
Now to the body... There are 2 colors there. One of the biggest things to consider on this kit is to paint both the black and the silver, or to paint the silver and apply the black decals provided. That is a personal choice. I don't like the risk of two-tone paint jobs very much. Given the choice, I went for the decals.
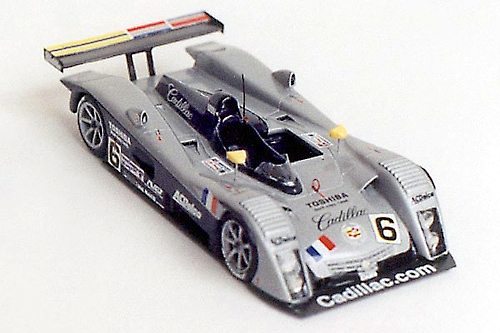
I painted the primer coats, with a quick sanding and checking between coats. The casting is very clean, so this didn't take long at all. Now the color for these Cadillacs are very tricky. It is not a straight silver or aluminium like shown on the instructions. It is a very delicate mix of colors made specially for the Cadillac sports car program. Very sophisticated.
I have seen the car in person. If this is the same color used in 2000, it gives a very different look with all the black panels. It looks darker and warmer. But I assumed that the color is the same. I have been told that the name of the color used in 2000 is a mix of aluminium and titanium, which should suggest the colors to mix.
I used aluminum with drops of gold to shift the hue to how I remember it on the 2000 car. As I said, with all the black panels, the perception of the color really changes. My mix was a little different for each coat. I was stronger with the gold at the beginning. I think I didn't add enough for the last coat of paint. But it depends on the lighting.
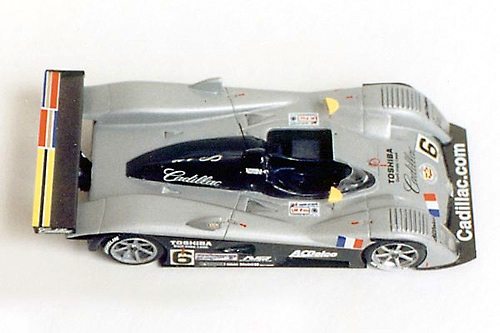
There were no problems applying them as long as Micro Sol is used to soften them. I started with the engine cover, moved on to the roll bar, then did the cockpit surrounding decal. Then I did the decals on the side, starting with the little one that goes in the NACA duct. Provence Moulage did not include a decal for the back of the engine cover. I had previously purchased a black decal sheet from a hobby store for situations just like this. That solved that problem.
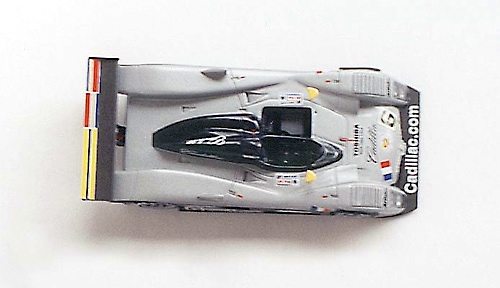
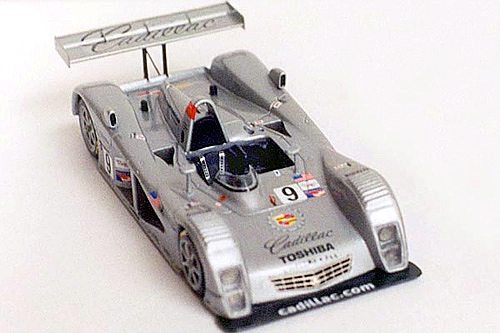
The other sponsor decals were applied without any problems. A clear coat was applied after a couple of days just sitting there. It adds more life to the silver, as well as sealing everything together. Interior Now that the chassis plate is black, it's time to detail the cockpit. I painted the seat a very dark grey just to break up the look of the surfaces. It's a subtle shift, but one I hope adds life to the model. I used left-over seat belt tape from a BBR kit to add to the seat. I find it's easier than painting them.
The instructions showed blue seat belts. I used black tape because I think blue is wrong. I painted electrical boxes gunmetal and picked out cast-in wires with a gloss black. I cut the top section off of the steering wheel to make it more accurate to a cockpit photo I have. The steering wheel rim was painted a dark gray, also. Assembly The body was left alone for about a week. Don't want to risk finger printing. The windscreen was attached to the body first Then the wheels were attached to the axles and positioned in the body. The body was then attached to the chassis. The splitters were attached. Then I chose to finish off the headlights complete with the covers. The lights are a tight fit. You could try smaller lights or trimming back the panel where the lights attach before painting. The little pieces above the front fenders were attached. These proved to be a little tricky. There is no grove to make fitting them easier. Finally the rear wing, antenna and some body clips that I added myself from extra parts.
Summary I do think that Provence Moulage could add a couple of improvements to their kits in general. I see no reason at this point to not include the bodywork fasteners, antennas, fuel fillers, and brake assemblies. These could be a generic set of photoetched parts included in many modern sports car kits. I feel these details would help raise the quality of the finished kit above the continually improving diecasts. Most parts fit just fine. I only needed to add support to strengthen the attachment of the rear wing and the headlights could be smaller. It really was rather stress-free to build successfully, considering the complication of a 2 color paint scheme.
A bit more about the Cadillac The BBR Le Mans 2000
|
||||||||||||||||||||||||||||||||||